By Adrian | November 25, 2018
Splunk. Love it to bits, use it at work heaps, but sadly for personal use once you go past that 500Mb/day license requirement thats it, get your wallet out. This is where ELK comes into play. Being open source I thought i’d give it a crack. Here is my experience.
I know there are plenty of guides online for this, but went through a bit of trial and error for my setup. These were the steps that I took setting up my Elasticsearch Logstash Kibana (ELK) stack.
Install Ubuntu 16.04 Server from the ISO. Follow the bouncing ball through the wizard
Perform a system update using
sudo apt-get update && sudo apt-get upgrade
Install java
sudo apt-get install default-jre
Confirm the java installation using
java -version
Install Elasticsearch
wget -qO – https://artifacts.elastic.co/GPG-KEY-elasticsearch | sudo apt-key add –
sudo apt-get install apt-transport-https
echo “deb https://artifacts.elastic.co/packages/6.x/apt stable main” | sudo tee -a /etc/apt/sources.list.d/elastic-6.x.list
sudo apt-get update
sudo apt-get install elasticsearch
Configure Elasticsearch and modify/uncomment the entries for network.host and http.port
sudo vim /etc/elasticsearch/elasticsearch.yml
Set Elasticsearch to run as a service
sudo /bin/systemctl daemon-reload
sudo /bin/systemctl enable elasticsearch.service
sudo /bin/systemctl start elasticsearch.service
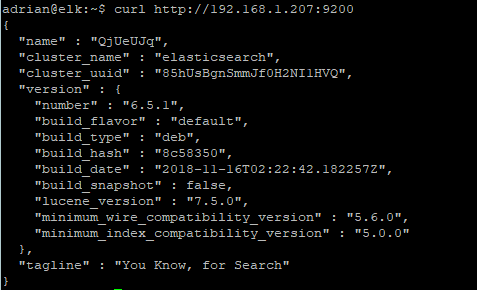
Test that Elasticsearch is running.
curl http://elasticsearch_ip:9200
Install Logstash
sudo apt-get install logstash
Install Kibana
sudo apt-get install kibana
Hope to follow up this entry with some of the joys of configuring logstash ready for data.