By Adrian | January 23, 2019
So now that i’ve moved the blog over to a serverless architecture I thought I’d take the time to post how I went about enabling SSL and where to from here.
Simple Storage Services (S3)
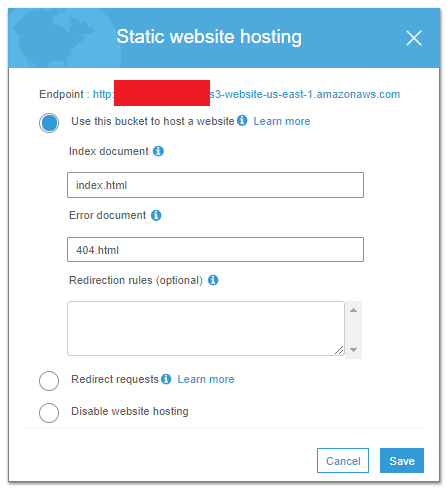
Getting a static website up via S3 is super easy. Open up the S3 console -> select your bucket -> go to Properties -> Static Website Hosting. Select Use this bucket to host a website. There you go. You can use the supplied endpoint to access your website! Make a note of this as you will need it for the Cloudfront Setup. But how easy was that? You also need to tweak the public access settings to allow access to the world so they can view your content.
To enable SSL/TLS on your site requires a little more configuration. These are the steps I went through to configure it.
Amazon Certificate Manager (ACM)
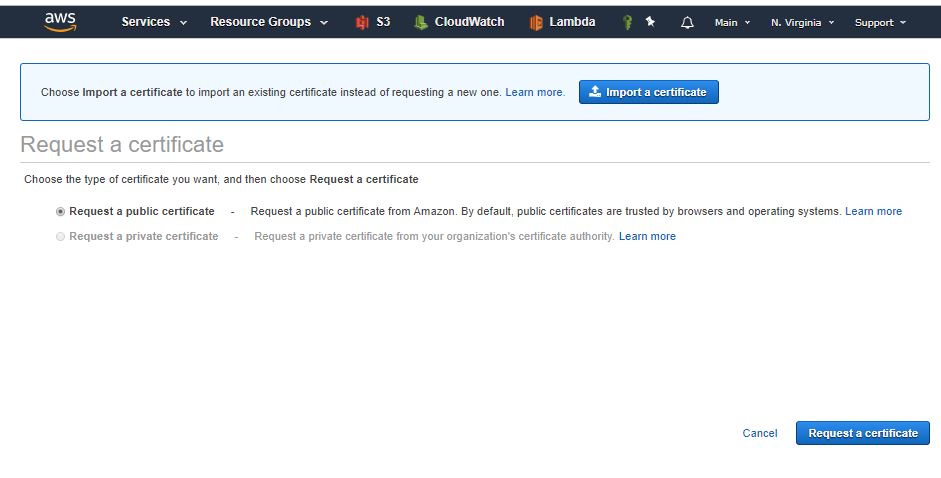
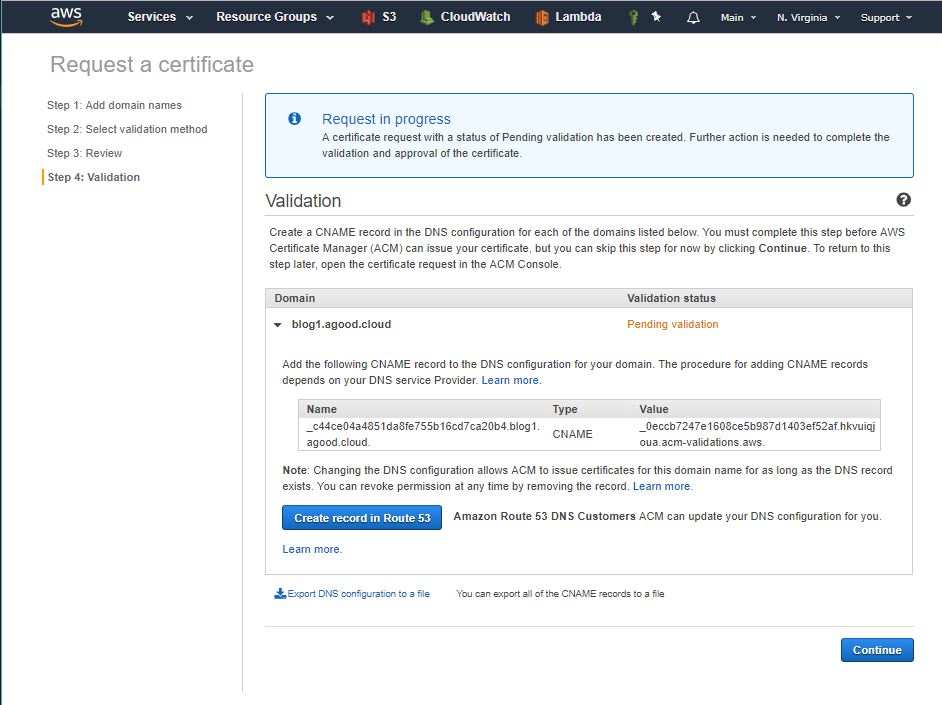
First open up the Certificate Management console and request a certificate. Ensure you are in the “us-east-1” (N.Virginia region) for this.
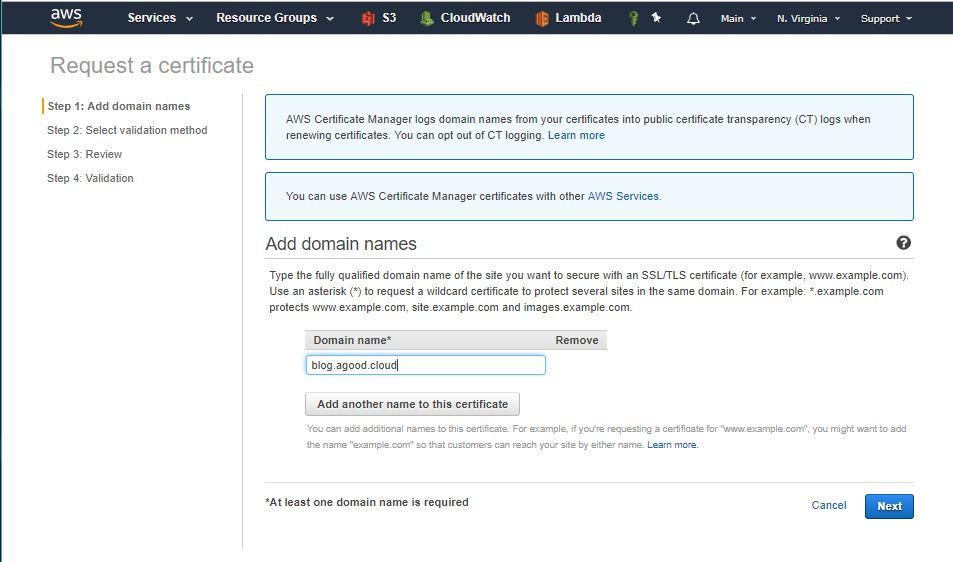
Add in the domain name(s)
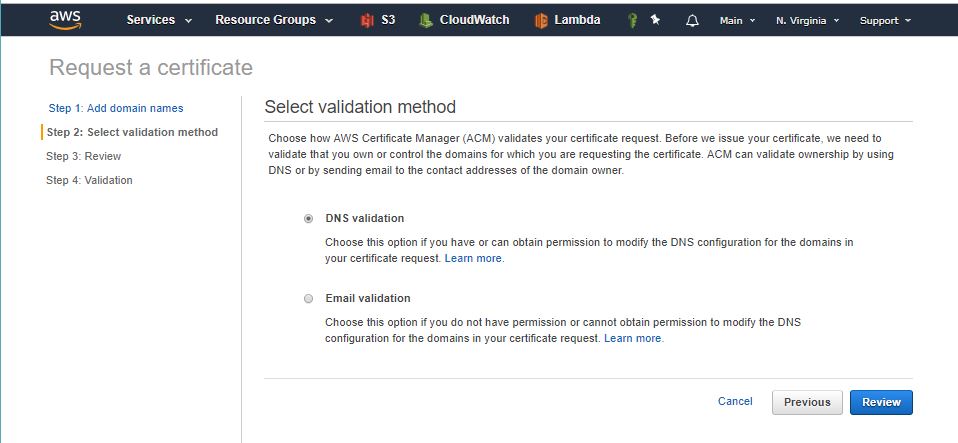
Select DNS validation
Select Confirm and Request

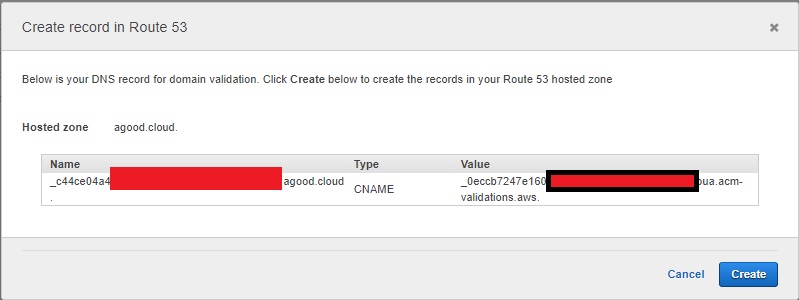
Next select create the record in Route 53 - This will create the validation record for you.
This is what will get populated in Route 53
Note: You may need to wait a few minutes for the certificate to change from Pending to Issued.
You can see this entry if you navigate out to Route 53.

Now we can head over to Cloudfront
Setup Cloudfront
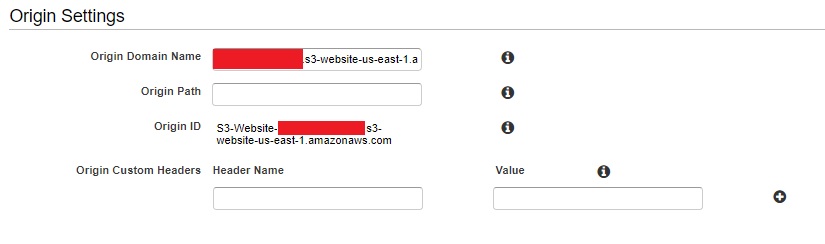
In the Cloudfront console, create a Web distribution. One thing that had me stumped for a while was due to me using the S3 bucket as the Origin. If you do this then you will run into issues with S3 not being able to have a default index.html object. The origin must be the S3 static endpoint and NOT the bucket name selected from the drop down list. AWS have stated that its not possible here. I guess it could be possible to do something using Lambda@edge but that just increases complexity.
This very helpful article helped me get my head around the issue
The CloudFront cache settings are pretty standard
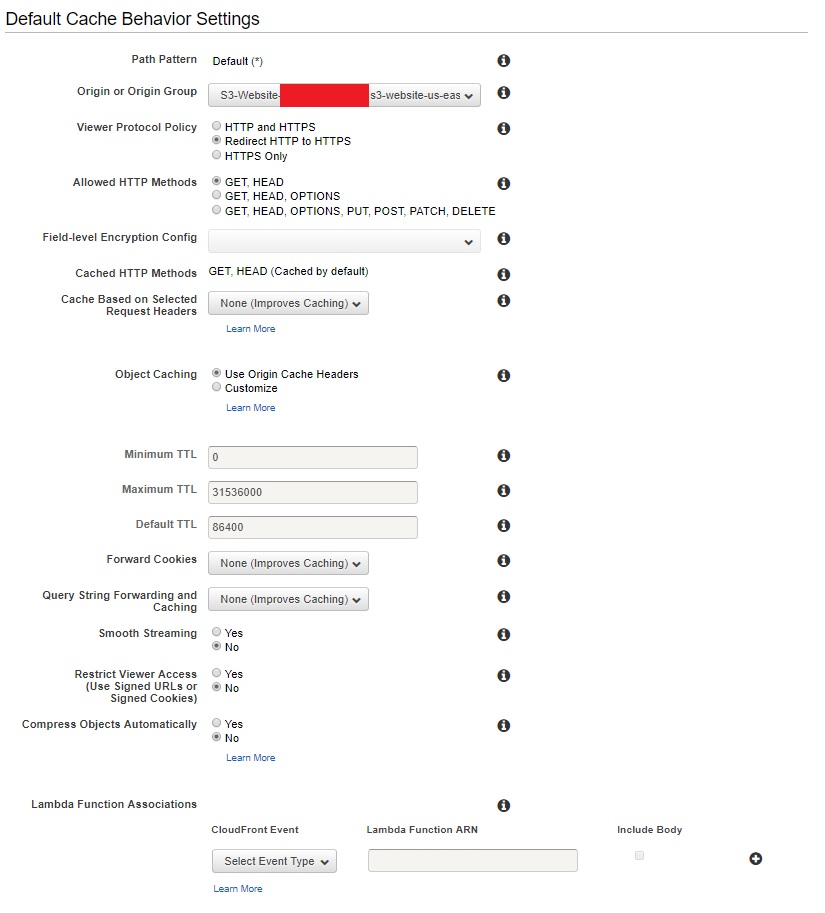
Finally the Distribution settings have a few tweaks. Ensure you have the CNAME set, and use the custom certificate you created with ACM. Most importantly use SNI to save yourself $600/month! Set your “Default Root Object” as index.html and send your logs to another bucket. Im sure ill do a write up at some stage about AWS Athena to query them.

After completing the Cloudfront configuration, hit Create Distribution in the lower right and wait…. and wait…. and wait…. It took between 15 and 25 mins to complete this part as your setup is pushed out to the always expanding list of AWS edge locations. Its important to note that if you make any changes to your Cloudfront configuration, that you also have that lengthy (re)deployment time to wait.
While you are here copy your cloudfront endpoint (ie: random.cloudfront.net.) as you will need that for the Route 53 alias.
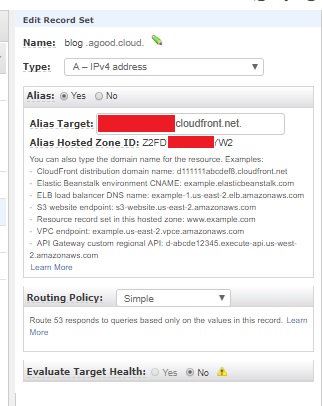
Route 53
The Cloudfront configuration is the longest part of this process, but after the status has changed to Deployed head over to the Route 53 console.
From here you can delete the CNAME record that ACM required for validation, and create a new A record. Make sure that Alias is set to yes and paste in your cloudfront endpoint.
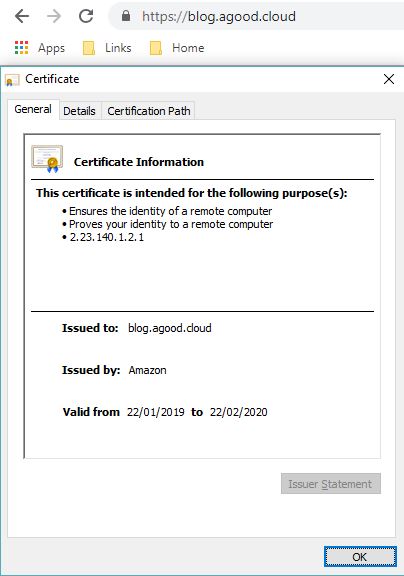
Once DNS has has a chance to propagate you should be able to access your website on HTTPS
Next ill write up about how to sync the content back to S3 as well as how to invalidate cached content.