By Adrian | February 3, 2019
Email for the blog? well that was the next thing I was wanting to tick off the list. Not only for the blog (I’m 99.99% certain I wont ever get an email), but I’ve always wanted to just pass out throw away email addresses for when I attend conferences - just to see who’s giving my email address around.
Luckily AWS have a solution called Simple Email Service (SES) which is designed for just this use case. I could have gone down the path of linking SES to AWS WorkMail, but at the cost of $4/month per user, it would have been overkill on the budget, plus it wouldn’t have given me the desired outcome.
SES Configuration
Next you setup the email domain to use in SES. Now stupidly, I’ve not actually learnt that I should be taking screenshots and documenting the process along the way. But this is what happens after you complete the “Verify a new domain wizard” and your domain has been validated.
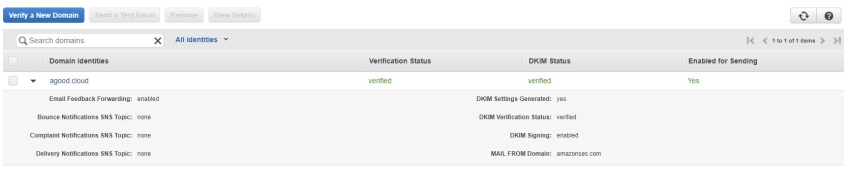
The actual steps involved have you enter in a domain name. Make sure Generate DKIM Settings is enabled.

and then if your domain is being hosted by Route 53, you can simply add all the required records by pressing the “Route 53” button.
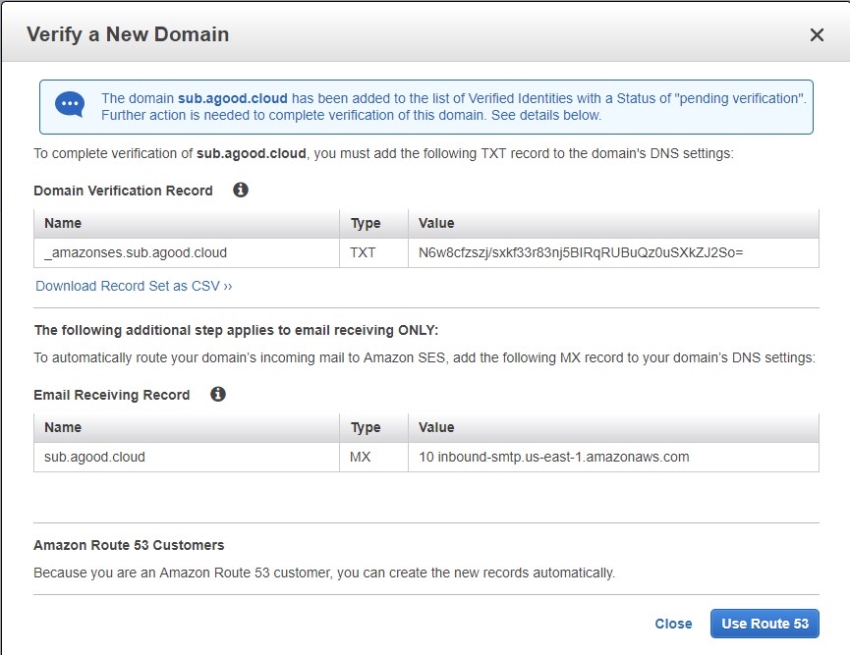 yay for Route 53
Validation of the domain took a few minutes from memory. If you are not using Route 53, its just a matter of entering in the records manually to your DNS management provider.
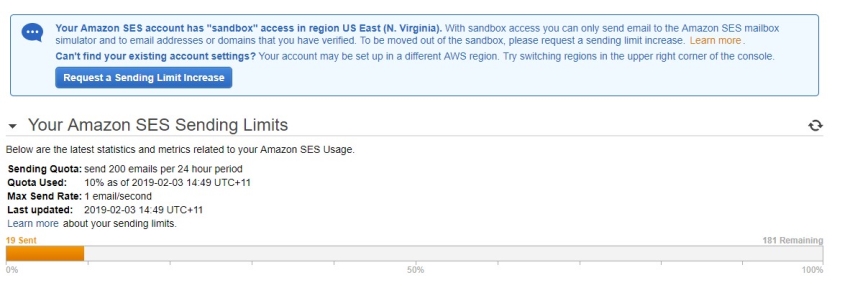
When you start with SES, you are put into “sandbox” mode which limits how many emails you can send and who you can send emails too. This tripped me up when I was testing I kept getting 554 rejection messages. You can nominate and verify additional address though, so its not the end of the world.
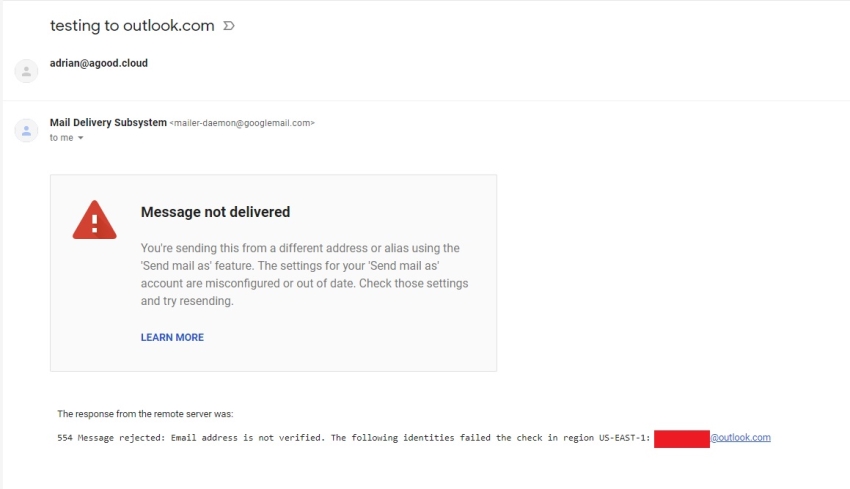
To add allowable senders/receivers head over to the “Email Addresses” section on the left and use the “Verify a New Email Address” button to add in more addresses. An email is sent to the specified recipient to confirm.

Next we need to create a Rule Set which tells SES what to do when it receives a message. For this solution you need S3 (to store the email), and Lambda (to perform the mail redirection to your Gmail account.) You can also add in SNS and subscribe to that topic if you need to troubleshoot, but I found that this wasn’t necessary by the end of it.
On the ruleset page, select “Create a ruleset” and then open up that blank ruleset that was created.

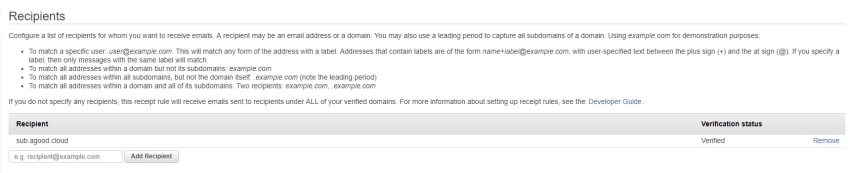
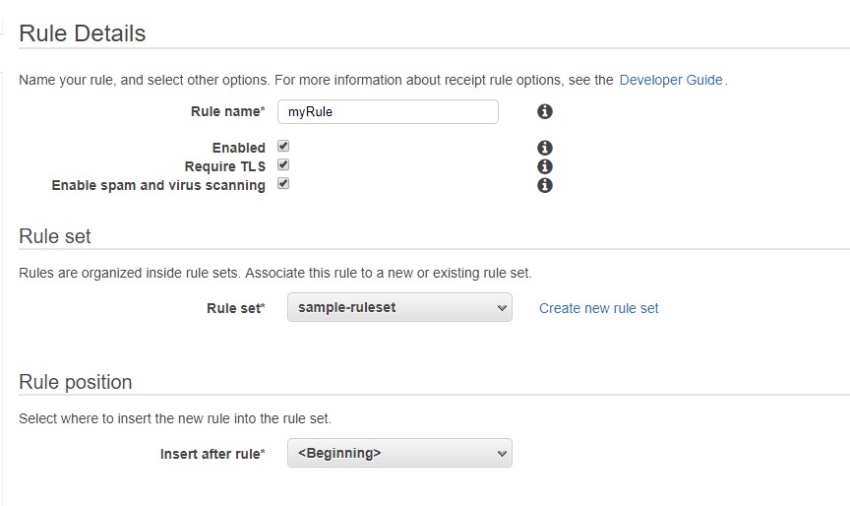
Next, create a rule for this ruleset. For the recipients, if you want to allow every email address simply put ‘yourdomain.com’, or you can add as many other individual accounts as required. In the Lambda script that we use, you can specify the allowable addresses as well. This is some configuration I might play around with some more, as I want to quickly add in more addresses.
For the action, you want to create a new S3 bucket for this purpose. The appropriate bucket policy will also be created for you. For this step, do not enable encryption. This is not S3 Server side encryption (SSE-S3), but client side encryption that’s applied by SES and you wont be able to decrypt those messages easily. I’ve elected to specify a prefix key of ‘incoming/’ and if you want to troubleshoot you can add in an SNS topic that will email you when this rule is triggered.
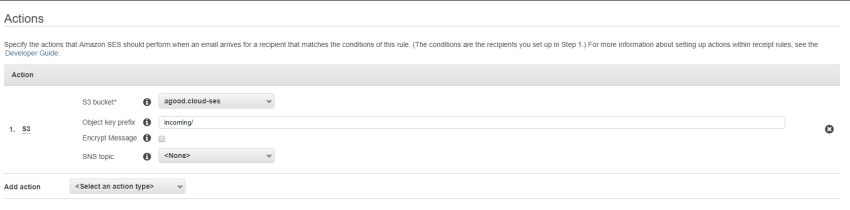
Note: You can always enable S3 encryption and I would suggest adding in a lifecycle policy to delete files after ‘n’ days dependant on how much email traffic you are expecting as you pay for storage costs.
Give the rule a name and ensure that TLS is selected, then review and create the rule.
Lambda Configuration
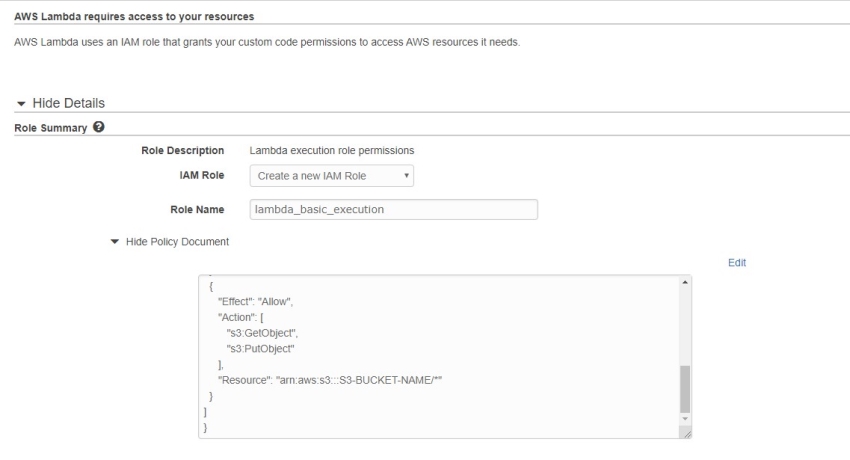
Once the initial SES configuration has been completed, create a new Lambda function, using Node.js 8.10 as the engine.
Create a new execution rule, and assign the following policy (don’t forget to update the S3 bucketname). Also set the execution timeout to be higher. I noticed that execution can take up to 1.5 seconds for smaller emails.
{
    "Version": "2012-10-17",
    "Statement": [
    {
        "Effect": "Allow",
        "Action": [
            "logs:CreateLogGroup",
            "logs:CreateLogStream",
            "logs:PutLogEvents"
        ],
        "Resource": "arn:aws:logs:*:*:*"
    },
    {
        "Effect": "Allow",
        "Action": "ses:SendRawEmail",
        "Resource": "*"
    },
    {
        "Effect": "Allow",
        "Action": [
            "s3:GetObject",
            "s3:PutObject"
        ],
        "Resource": "arn:aws:s3:::YOUR_BUCKET_NAME/*"
    }
    ]
}
Download the required Lambda code from github. Massive props to the people behind this code. It’s what make this whole solution work. You do need to update the following section of code with your specifics. The comment block in the code is clear on what is required here.
var defaultConfig = {
  fromEmail: "noreply@yourdomain.com",
  subjectPrefix: "",
  emailBucket: "YOUR_S3_BUCKETNAME",
  emailKeyPrefix: "incoming/",
  forwardMapping: {
    "targetuser@yourdomain.com": [
      "destination@gmail.com"
    ],
    "abuse@yourdomain.com": [
      "destination@gmail.com"
    ]
  }
};
SES Configuration Update
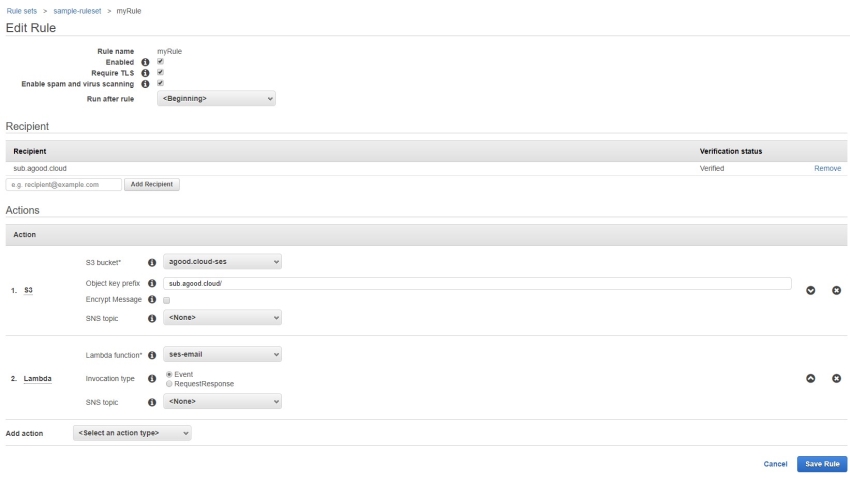
Now the Lambda function is complete, you need to update the SES ruleset so that it triggers this Lambda function when an email is received. Keep the invocation method as ‘Event’ and add in and subscribe to a SNS topic if you require extra troubleshooting or have additional workflows in mind.
Next we need to generate the SMTP account credentials. On the left select “SMTP Settings” then “Create my SMTP Settings”. Make a note of the SMTP server as you will need that for the Gmail configuration below.
What this process does is create a new IAM user with an SMTP User/Pass which is basically the same as a Access Key and Secret Access Key. However don’t get the 2 mixed up and don’t be putting your admin accounts access keys into Gmail.

These keys are only displayed once, and if you ever forget or change the settings in Gmail, I found that I wasn’t able to just invalidate and recreate the keys, but I had to recreate user from SES again. Not sure if this was a timing issue and I was being impatient or if this was by design.

Gmail Configuration
Armed with your SMTP Credentials, open up your Gmail settings and select “Accounts and Import”. Add a new email address under the “Send mail as” section. Give it a friendly name and the email address you want to setup.
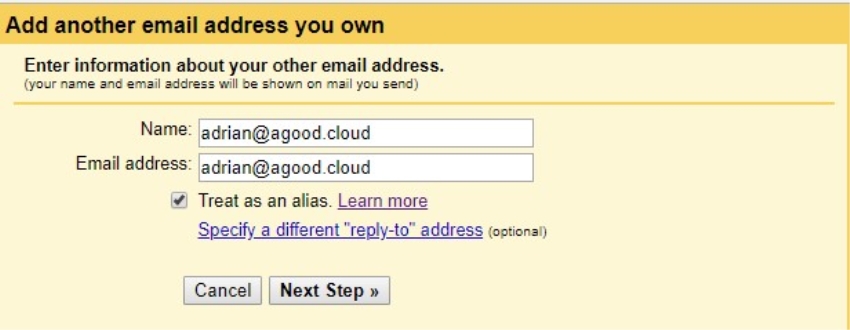 The SMTP server will be incorrectly filled, but remember the step above about making a note of that SMTP server? put that address in this page. Also your SMTP user/password combo. After that you will be able to send/receive emails to only emails that have been verified (remember you are in the sandpit!).
Breaking out of the sandpit
At the time of writing this, I’ve requested to be let out of the sandpit through AWS support, but I assume that because its the weekend, someone will get around to it next week. Back in SES under sending statistics, there is a large blue box where you can “Request a sending limit increase” which takes you to a form to fill in. It’s a matter of accepting a few terms and conditions and waiting.
 So now… if you want to contact me… adrian[at]agood.cloud