By Adrian | February 17, 2019
With the local lab built these are the instructions for getting the Detection Lab into the AWS.
How to stand up DetectionLab in AWS - Part II
Pre-requisites
Part I - Local Install
Terraform installation
Export VM’s as OVA’s
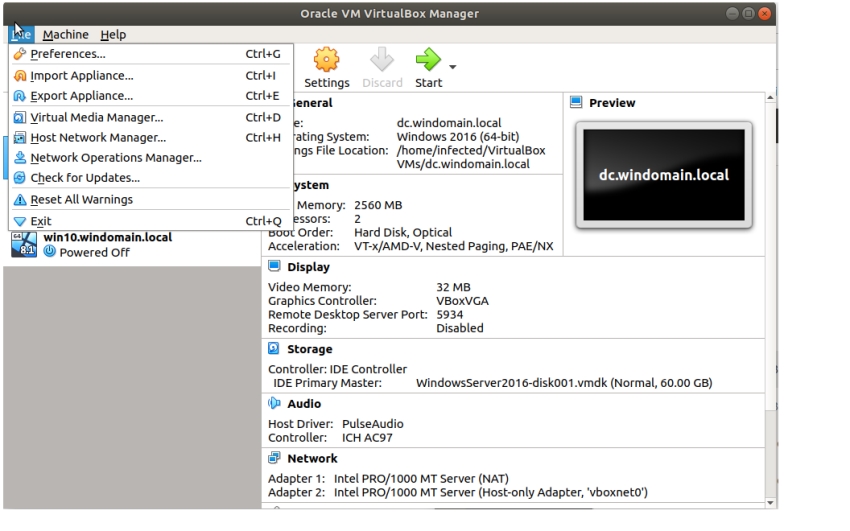
Shutdown each VM and open up the VirtualBox GUI. Select each VM and select “File, Export Appliance”.
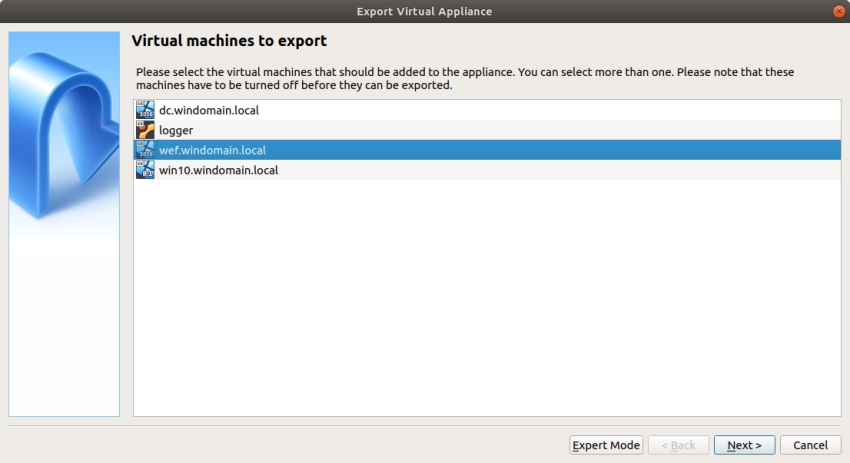
Select the VM to export
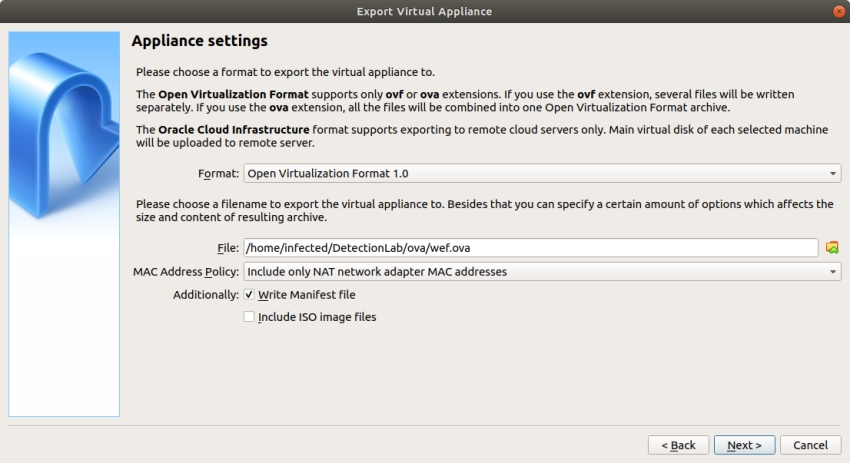
Select the output file
Enter in any additional product information. I left this blank and the name was auto populated.
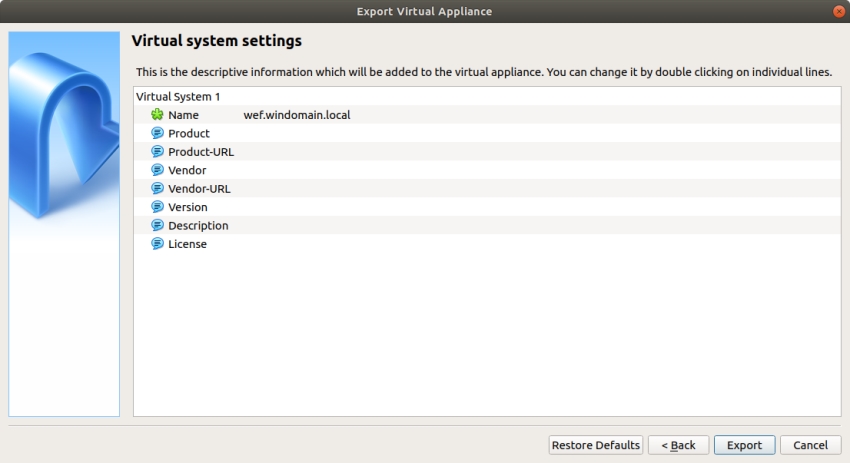
The VM being exported.
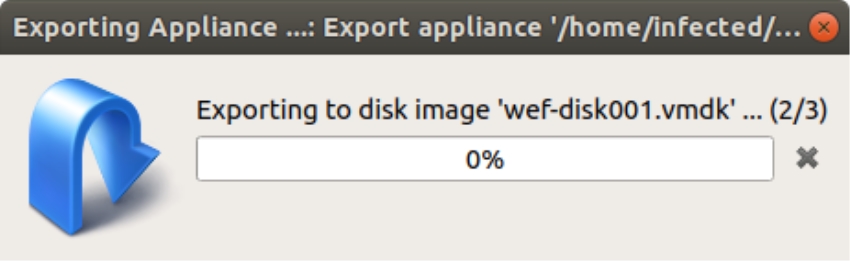
This took between 10 and 30 mins per VM to complete. So you can complete some of the AWS steps in the meantime.
Decide which AWS region
Because I would like to keep the overall costs down, I would like to be able to run the lab on spot instances. I know that these can be terminated with minimal warning, but I think the cost savings will be worth the potential inconvenience here. Worst case I could always spin them up “On-Demand” instances, or run them on “Reserved Instances” should it be warranted.
As far as selecting an AWS region is concerned, you have a few major considerations:
- Am I bound by any laws, regulations or data sovereignty issues that bind me to a country? No
- Where I stand the lab up should be as close to the user base to minimize latency. In this case it would be Sydney, but ill wear the latency for cost reduction. The AP* Regions are not the cheapest to operate in.
- As cost is the deciding factor, I wanted to check out the spot instance prices for the last 3 months too see where a bargain could be had. These are the average prices over the last 3 months and I am looking for a price that doesn’t fluctuate wildly.
ap-southeast-2 (Sydney)
| t3.small | t3.medium |
|---|---|
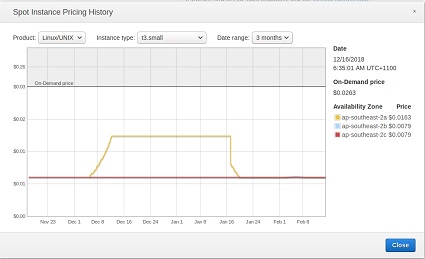 On demand: $0.0263/hr — spot $0.0079/hr On demand: $0.0263/hr — spot $0.0079/hr |
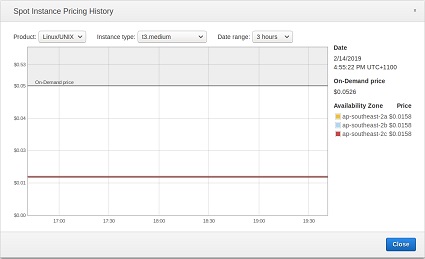 On demand: $0.0526/hr — spot $0.0158/hr On demand: $0.0526/hr — spot $0.0158/hr |
us-east-1 (North Virginia)
| t3.small | t3.medium |
|---|---|
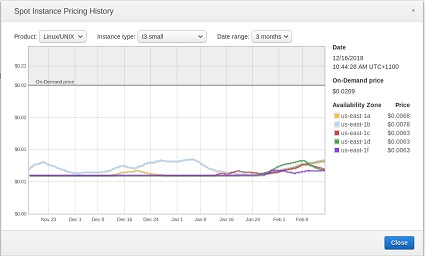 On demand: $0.0209/hr — spot $0.0063/hr On demand: $0.0209/hr — spot $0.0063/hr |
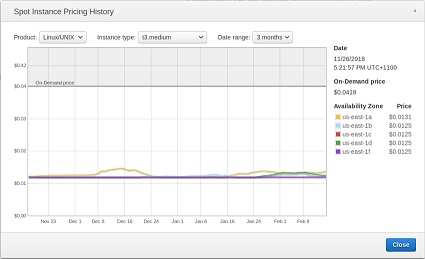 On demand: $0.0418/hr — spot $0.0125/hr On demand: $0.0418/hr — spot $0.0125/hr |
us-west-2 (Oregon)
| t3.small | t3.medium |
|---|---|
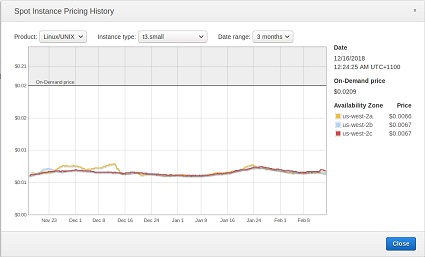 On demand: $0.0209hr — spot $0.0066/hr On demand: $0.0209hr — spot $0.0066/hr |
 On demand: $0.0418/hr — spot $0.0125/hr On demand: $0.0418/hr — spot $0.0125/hr |
eu-west-1 (Ireland)
| t3.small | t3.medium |
|---|---|
| On demand: $0.0227/hr — spot $0.0068/hr |
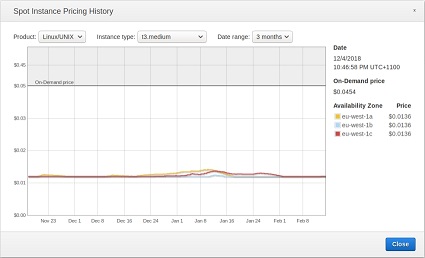 On demand: $0.0454/hr — spot $0.0136/hr On demand: $0.0454/hr — spot $0.0136/hr |
Based on the scenario of 3 x t3.smalls and 1 x t3.medium running for an average of 20 hours a week the cost at these rates is as follows:
| region | on-demand instances | spot instances | savings |
|---|---|---|---|
| ap-southeast-1 | $1.578 + $1.052 = $2.63 | $0.474 + $0.316 = $0.79 | $1.840 |
| us-east-1 | $1.254 + $0.836 = $2.09 | $0.378 + $0.250 = $0.628 | $1.462 |
| us-west-2 | $1.254 + $0.836 = $2.09 | $0.396 + $0.250 = $0.646 | $1.444 |
| eu-west-1 | $1.362 + $0.908 = $2.27 | $0.408 + $0.272 = $0.680 | $1.590 |
Keep in mind the longer these are turned on, the higher the overall cost and savings
At the end of the day I went with North Virginia (us-east-1) as it is one of the larger regions so the overall costs are lower.
EDIT: Due to restrictions in AWS, I can only run the linux machine as a Spot Instance.
Prepare AWS S3 bucket
Now that we have the region picked, in the AWS console create an S3 bucket that will be used to store the OVA files. We need to stick to the selected region as you don’t want to have to replicate the files cross region as there are extra costs associated in doing this.
In the S3 console, create a globally unique bucket.
Create IAM User: terraform
In the IAM Console create a user called ‘terraform’ and grant it programatic access only. Keep a record of the Access key and Secret Access key.
Ensure the user has the following policies applied
- AmazonEC2FullAccess
- AmazonS3ReadOnlyAccess
- CloudWatchLogsFullAccess
- VMImportExportRoleForAWSConnector
- IAMReadOnlyAccess
In you .aws\credentials file add the following profile.
[terraform]
aws_access_key_id = ACCESSKEY
aws_secret_access_key = SECRET_ACCESS_KEY
Create IAM Role: vmimport
Create file: trust-policy.json
{
   "Version": "2012-10-17",
   "Statement": [
      {
         "Effect": "Allow",
         "Principal": { "Service": "vmie.amazonaws.com" },
         "Action": "sts:AssumeRole",
         "Condition": {
            "StringEquals":{
               "sts:Externalid": "vmimport"
            }
         }
      }
   ]
}
Create the role from the AWS CLI by running the following command. The CLI user will require “IAMFullAccess” Role to perform this action.
aws iam create-role --role-name vmimport --assume-role-policy-document file://trust-policy.json

# Output:

{
    "Role": {
        "Path": "/",
        "RoleName": "vmimport",
        "RoleId": "AROAJZN2O2DXAANSUHOKC",
        "Arn": "arn:aws:iam::[ACCOUNT-ID]:role/vmimport",
        "CreateDate": "2019-02-14T10:32:30Z",
        "AssumeRolePolicyDocument": {
            "Version": "2012-10-17",
            "Statement": [
                {
                    "Effect": "Allow",
                    "Principal": {
                        "Service": "vmie.amazonaws.com"
                    },
                    "Action": "sts:AssumeRole",
                    "Condition": {
                        "StringEquals": {
                            "sts:Externalid": "vmimport"
                        }
                    }
                }
            ]
        }
    }
}
Create role policy for S3
Create file: role-policy.json
{
   "Version":"2012-10-17",
   "Statement":[
      {
         "Effect":"Allow",
         "Action":[
            "s3:GetBucketLocation",
            "s3:GetObject",
            "s3:ListBucket"
         ],
         "Resource":[
            "arn:aws:s3:::YOUR_BUCKET_GOES_HERE",
            "arn:aws:s3:::YOUR_BUCKET_GOES_HERE/*"
         ]
      },
      {
         "Effect":"Allow",
         "Action":[
            "ec2:ModifySnapshotAttribute",
            "ec2:CopySnapshot",
            "ec2:RegisterImage",
            "ec2:Describe*"
         ],
         "Resource":"*"
      }
   ]
}
Attach the role policy from the AWS CLI by running the following command. The CLI user will require “IAMFullAccess” Role to perform this action.
aws iam put-role-policy --role-name vmimport --policy-name vmimport --policy-document file://role-policy.json

Output: none
Copy the OVA’s to S3
Time to kill the internet connection. All up there are ~27Gb of files.

You can use the following command
aws s3 sync . s3://[BUCKET_NAME]
Check the upload has completed by using the following command
aws s3 ls s3://[BUCKET_NAME]
2019-02-14 22:22:13 9725982208 dc.ova
2019-02-14 21:42:12 2638133760 logger.ova
2019-02-14 22:22:14        621 role-policy.json
2019-02-14 22:28:38        330 trust-policy.json
2019-02-14 22:22:14 10560133120 wef.ova
2019-02-14 22:22:14 6809267200 win10.ova
Convert the OVA’s in S3 into AMI’s
Create file: logger.json, dc.json, wef.json and win10.json. Change the description, S3Bucket and S3 key accordingly.
[
  {
    "Description": "dc",
    "Format": "ova",
    "UserBucket": {
        "S3Bucket": "YOUR_BUCKET_GOES_HERE",
        "S3Key": "dc.ova"
    }
}]
Run the following commands to start the process. I found that my CLI account required the following permissions in order for this to work.
- AmazonEC2FullAccess
- VMImportExportRoleForAWSConnector
- AmazonS3ReadOnlyAccess
aws ec2 import-image --description "dc" --license-type byol --disk-containers file://dc.json
aws ec2 import-image --description "wef" --license-type byol --disk-containers file://wef.json
aws ec2 import-image --description "win10" --license-type byol --disk-containers file://win10.json
aws ec2 import-image --description "logger" --license-type byol --disk-containers file://logger.json
Sample output from one of these commands:
{
    "Description": "win10",
    "ImportTaskId": "import-ami-0cecba1545beaac2e",
    "LicenseType": "BYOL",
    "Progress": "2",
    "SnapshotDetails": [
        {
            "DiskImageSize": 0.0,
            "Format": "OVA",
            "UserBucket": {
                "S3Bucket": "BUCKET_NAME",
                "S3Key": "win10.ova"
            }
        }
    ],
    "Status": "active",
    "StatusMessage": "pending"
}
Monitor the progress of the import
The importing does take some time and you can check the status of the status of the import by running this command:
aws ec2 describe-import-image-tasks --import-task-ids import-ami-0cecba1545beaac2e
Sample output:
{
    "ImportImageTasks": [
        {
            "Architecture": "x86_64",
            "Description": "win10",
            "ImportTaskId": "import-ami-0cecba1545beaac2e",
            "LicenseType": "BYOL",
            "Platform": "Windows",
            "Progress": "52",
            "SnapshotDetails": [
                {
                    "DeviceName": "/dev/sda1",
                    "DiskImageSize": 6809251328.0,
                    "Format": "VMDK",
                    "Status": "completed",
                    "UserBucket": {
                        "S3Bucket": "BUCKET_NAME",
                        "S3Key": "win10.ova"
                    }
                }
            ],
            "Status": "active",
            "StatusMessage": "preparing to boot"
        }
    ]
}
Configure the Terraform variables
Now that we have built the lab, uploaded it to S3, converted them into AMI images we can complete the final peice which is to use Terraform to build the instance.
Create file: terraform.ftvars
# The region you would like EC2 instances in
# Defaults to us-west-1
region = "us-east-1"
# Path to the credentials file for AWS (usually /Users/username/.aws/credentials)
shared_credentials_file = "path in here"
# Path to the SSH public key to be added to the logger host
# Example: /Users/username/.ssh/id_terrraform.pub
public_key_path = "path in here"
# AMI ID for each host
# Example: "ami-xxxxxxxxxxxxxxxxx"  your AMI's will be different
logger_ami = "import-ami-076ad9d0e4f89b599"
dc_ami =  "import-ami-05eb49004d2dc9301"
wef_ami = "import-ami-0282ebae9b3ae3b8c"
win10_ami = "import-ami-0cecba1545beaac2e"
# IP Whitelist - Subnets listed here can access the lab over the internet.  Add in your public /32 address
# Sample: ["1.1.1.1/32", "2.2.2.2/24"]
ip_whitelist = ["0.0.0.0/0"]
Update the main.tf file
The github link contains the main terraform template that uses on-demand instances. I used the following configuration to use one time, spot instances that terminate after 6 hours instead.
# Terraform configuration to be used with DetectionLab Method1
# Before using this, you must fill out the variables in terraform.tfvars
# Please follow the instructions in https://github.com/clong/DetectionLab/blob/master/Terraform/Method1/Method1.md

variable "region" {
  default = "us-east-1"
}
variable "shared_credentials_file" {
  type = "string"
}
variable "key_name" {
  default = "id_terraform"
}
variable "public_key_path" {
  type = "string"
}
variable "ip_whitelist" {
  type = "list"
}
variable "logger_ami" {}
variable "dc_ami" {}
variable "wef_ami" {}
variable "win10_ami" {}

# Specify the provider and access details
provider "aws" {
  shared_credentials_file = "${var.shared_credentials_file}"
  region = "${var.region}"
  profile = "terraform"
}

# Create a VPC to launch our instances into
resource "aws_vpc" "default" {
  cidr_block = "192.168.0.0/16"
}

# Create an internet gateway to give our subnet access to the outside world
resource "aws_internet_gateway" "default" {
  vpc_id = "${aws_vpc.default.id}"
}

# Grant the VPC internet access on its main route table
resource "aws_route" "internet_access" {
  route_table_id         = "${aws_vpc.default.main_route_table_id}"
  destination_cidr_block = "0.0.0.0/0"
  gateway_id             = "${aws_internet_gateway.default.id}"
}

# Create a subnet to launch our instances into
resource "aws_subnet" "default" {
  vpc_id                  = "${aws_vpc.default.id}"
  cidr_block              = "192.168.38.0/24"
  map_public_ip_on_launch = true
}

# Our default security group for the logger host
resource "aws_security_group" "logger" {
  name        = "logger_security_group"
  description = "DetectionLab: Security Group for the logger host"
  vpc_id      = "${aws_vpc.default.id}"

  # SSH access
  ingress {
    from_port   = 22
    to_port     = 22
    protocol    = "tcp"
    cidr_blocks = "${var.ip_whitelist}"
  }

  # Splunk access
  ingress {
    from_port   = 8000
    to_port     = 8000
    protocol    = "tcp"
    cidr_blocks = "${var.ip_whitelist}"
  }

  # Fleet access
  ingress {
    from_port   = 8412
    to_port     = 8412
    protocol    = "tcp"
    cidr_blocks = "${var.ip_whitelist}"
  }

  # Caldera access
  ingress {
    from_port   = 8888
    to_port     = 8888
    protocol    = "tcp"
    cidr_blocks = "${var.ip_whitelist}"
  }

  # Allow all traffic from the private subnet
  ingress {
    from_port   = 0
    to_port     = 0
    protocol    = "-1"
    cidr_blocks = ["192.168.38.0/24"]
  }

  # outbound internet access
  egress {
    from_port   = 0
    to_port     = 0
    protocol    = "-1"
    cidr_blocks = ["0.0.0.0/0"]
  }
}

resource "aws_security_group" "windows" {
  name        = "windows_security_group"
  description = "DetectionLab: Security group for the Windows hosts"
  vpc_id      = "${aws_vpc.default.id}"

  # RDP
  ingress {
    from_port   = 3389
    to_port     = 3389
    protocol    = "tcp"
    cidr_blocks = "${var.ip_whitelist}"
  }

  # WinRM
  ingress {
    from_port   = 5985
    to_port     = 5986
    protocol    = "tcp"
    cidr_blocks = "${var.ip_whitelist}"
  }

  # Allow all traffic from the private subnet
  ingress {
    from_port   = 0
    to_port     = 0
    protocol    = "-1"
    cidr_blocks = ["192.168.38.0/24"]
  }

  # outbound internet access
  egress {
    from_port   = 0
    to_port     = 0
    protocol    = "-1"
    cidr_blocks = ["0.0.0.0/0"]
  }
}

resource "aws_key_pair" "auth" {
  key_name   = "${var.key_name}"
  public_key = "${file(var.public_key_path)}"
}

resource "aws_spot_instance_request" "logger" {
  instance_type = "t3.medium"
  ami = "${var.logger_ami}"
  spot_price    = "0.02"
  spot_type = "one-time"
  block_duration_minutes = "360"
  tags {
    Name = "logger"
    Spot = "Yes"
  }
  subnet_id = "${aws_subnet.default.id}"
  vpc_security_group_ids = ["${aws_security_group.logger.id}"]
  key_name = "${aws_key_pair.auth.id}"
  private_ip = "192.168.38.105"
  # Run the following commands to restart Fleet
  provisioner "remote-exec" {
    inline = [
      "cd /home/vagrant/kolide-quickstart && sudo docker-compose stop",
      "sudo service docker restart",
      "cd /home/vagrant/kolide-quickstart && sudo docker-compose start"
    ]
    connection {
      type = "ssh"
      user = "vagrant"
      password = "vagrant"
    }
  }
  root_block_device {
    delete_on_termination = true
  }
}

resource "aws_instance" "dc" {
  instance_type = "t2.small"
  ami = "${var.dc_ami}"
  tags {
    Name = "dc.windomain.local"
  }
  subnet_id = "${aws_subnet.default.id}"
  vpc_security_group_ids = ["${aws_security_group.windows.id}"]
  private_ip = "192.168.38.102"
  root_block_device {
    delete_on_termination = true
  }
}

resource "aws_instance" "wef" {
  instance_type = "t2.small"
  ami = "${var.wef_ami}"
  tags {
    Name = "wef.windomain.local"
  }
  subnet_id = "${aws_subnet.default.id}"
  vpc_security_group_ids = ["${aws_security_group.windows.id}"]
  private_ip = "192.168.38.103"
  root_block_device {
    delete_on_termination = true
  }
}

resource "aws_instance" "win10" {
  instance_type = "t2.small"
  ami = "${var.win10_ami}"
  tags {
    Name = "win10.windomain.local"
  }
  subnet_id = "${aws_subnet.default.id}"
  vpc_security_group_ids = ["${aws_security_group.windows.id}"]
  private_ip = "192.168.38.104"
  root_block_device {
    delete_on_termination = true
  }
}
Request a limit increase from AWS for EC2 Spot instances
When I was testing out using Terraform using spot requests, I recieved the following error.
Error requesting spot instances: MaxSpotInstanceCountExceeded: Max spot instance count exceeded
To get around this I had to fill in an AWS support request to request spot instances for the t2.small instance type. The t3.medium type built OK.
You cannot use spot instances for BYOL
Sadly, I was hoping I could run all instances as Spot Instance types, however everytime I tried to stand up the lab I would see the error “Unsupported Product”. I attempted to rebuild the lab to no avail and AWS support confirmed that it was not possible.
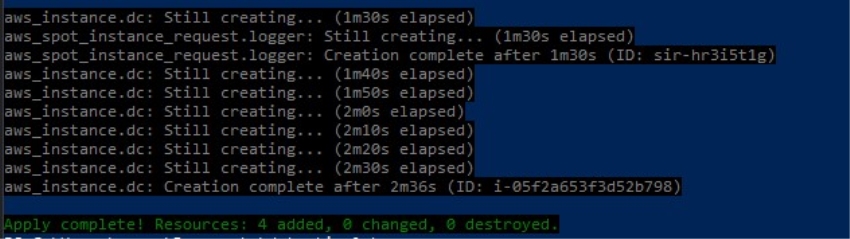
Standing up the lab
Now that all the configuration is done, you can standup the lab by using the following command.
terraform apply
Accessing the Lab
To access the lab you can simply RDP to the windows based hosts and SSH into the logger host using the public IP’s. You should always lock down your lab so that only you can access it, so dont leave the “whitelist” as 0.0.0.0/0!

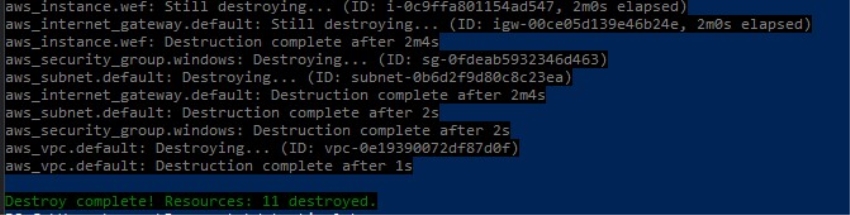
Tearing down the Lab
terraform destroy
After all the effort of setting this up in AWS, there are some other costs involved, such as
- 30Gb of OVA’s in S3, costs around $0.70/month
- AMI’s use EBS Snapshots at around $25/month for the 244Gb of provisioned volumes.
- EC2 Usage fees starting at around $0.08c/hr
And based off the fact that I have a fully functional local lab, ill use this instead, and keep the files in S3, to share with others who want it.