By Adrian | October 17, 2019
User awareness training, it matters, more than you think it does. These days security is everybody’s responsibility and not just those running your information security team. Defense in depth and technical controls are not foolproof and it only takes a single well crafted email and your organisation could be owned. People are the last line of defense so we need to train staff to adopt a critical mindset in the hostility of email.
What better way to train them in the ways of phishing detection by putting them in the situation, in a safe and controlled manner. In this post I’m looking at another Free and Open Source tool named Gophish and heres how you can go about and simulate a phishing campaign against your userbase.
The Gophish platform can be run on Windows and Linux and I’ll continue to run with Linux as my base platform here. The use of the framwork wont change past the install install. The documentation that is provided on the github page is very comprehensive as it is. Honestly you probably won’t need this blog post which will more than likely outdate!
Pre-requisites
First, download the application and extract the contents of the zip
cd ~
mkdir gophish
cd gophish
wget https://github.com/gophish/gophish/releases/download/v0.8.0/gophish-v0.8.0-linux-64bit.zip
unzip gophish-v0.8.0-linux-64bit.zip
By default, Gophish uses a self signed certificate for the admin server and no certificate for Phishing server. For simplicity, we will generate a single key for both using Let’s Encrypt. This can be performed with the following commands:
Install certbot components
sudo apt-get update
sudo apt-get install software-properties-common
sudo add-apt-repository universe
sudo add-apt-repository ppa:certbot/certbot
sudo apt-get install -y certbot python-certbot-nginx
Install AWS CLI for route53 config
sudo apt install -y python3-pip
sudo pip3 install certbot-dns-route53

# Install the AWSCLI
sudo apt-get install -y awscli

# Configure aws with credentials with an account that has access to Route53
sudo aws configure
Generate the certificate
sudo certbot certonly --dns-route53 -d 'gophish.example.com' -d 'support.example.com' --server https://acme-v02.api.letsencrypt.org/directory -m youremail@example.com --non-interactive --agree-tos

# Change the ownership of the certificate files
sudo chown -R user:user /etc/letsencrypt/archive
sudo chown -R user:user /etc/letsencrypt/live

# Link the required certificates
sudo ln -s /etc/letsencrypt/live/gophish.example.com/privkey.pem gophish_admin.key
sudo ln -s /etc/letsencrypt/live/gophish.example.com/fullchain.pem gophish_admin.crt
Configure json.conf
Now we need to update the config.json file with the new settings, If your not running this as root (and you shouldnt be) you wont be able to use ports 80⁄443. I have used the following config:
{
        "admin_server": {
                "listen_url": "0.0.0.0:3333",
                "use_tls": true,
                "cert_path": "gophish_admin.crt",
                "key_path": "gophish_admin.key"
        },
        "phish_server": {
                "listen_url": "0.0.0.0:8080",
                "use_tls": true,
                "cert_path": "gophish_admin.crt",
                "key_path": "gophish_admin.key"
        },
        "db_name": "sqlite3",
        "db_path": "gophish.db",
        "migrations_prefix": "db/db_",
        "contact_address": "",
        "logging": {
                "filename": ""
        }
}
Note: by default a sqlite3 database is used, but it can be modified to use a MySQL database if you require something a little more robust.
Start Gophish and access the Gophish console
You can start the Gophish application using this command:
./gophish

# Output
time="2019-10-13T05:20:50Z" level=warning msg="No contact address has been configured."
time="2019-10-13T05:20:50Z" level=warning msg="Please consider adding a contact_address entry in your config.json"
goose: migrating db environment 'production', current version: 0, target: 20190105192341
OK    20160118194630_init.sql
OK    20160131153104_0.1.2_add_event_details.sql
OK    20160211211220_0.1.2_add_ignore_cert_errors.sql
OK    20160217211342_0.1.2_create_from_col_results.sql
OK    20160225173824_0.1.2_capture_credentials.sql
OK    20160227180335_0.1.2_store-smtp-settings.sql
OK    20160317214457_0.2_redirect_url.sql
OK    20160605210903_0.2_campaign_scheduling.sql
OK    20170104220731_0.2_result_statuses.sql
OK    20170219122503_0.2.1_email_headers.sql
OK    20170827141312_0.4_utc_dates.sql
OK    20171027213457_0.4.1_maillogs.sql
OK    20171208201932_0.4.1_next_send_date.sql
OK    20180223101813_0.5.1_user_reporting.sql
OK    20180524203752_0.7.0_result_last_modified.sql
OK    20180527213648_0.7.0_store_email_request.sql
OK    20180830215615_0.7.0_send_by_date.sql
OK    20190105192341_0.8.0_rbac.sql
time="2019-10-13T05:20:50Z" level=info msg="Creating new self-signed certificates for administration interface"
time="2019-10-13T05:20:50Z" level=info msg="Starting phishing server at http://0.0.0.0:80"
time="2019-10-13T05:20:50Z" level=info msg="Background Worker Started Successfully - Waiting for Campaigns"
time="2019-10-13T05:20:50Z" level=info msg="TLS Certificate Generation complete"
time="2019-10-13T05:20:50Z" level=info msg="Starting admin server at https://0.0.0.0:3333"
We have now downloaded the application, generated our own Lets Encrypt certificates, configured the json file and started the application. Now access the WebGUI with the address of https://yourgophish.example.com:3333. The deafult username is admin and password is gophish. Go ahead and change those default credentials after you login by using the admin profile option at the top right hand side of the screen.
Initial configuration for a campaign
There are number of steps that you need to take in order to setup a campaign. You will need to have the following configured prior to setting up a campaign:
Users & groups(ie: the victims)- An
email template(the phishing email) - A
landing page(the page that will be seen when a phishing link is clicked) - A
sending profile(contains the SMTP server settings and from user)
Setting up Users and Groups
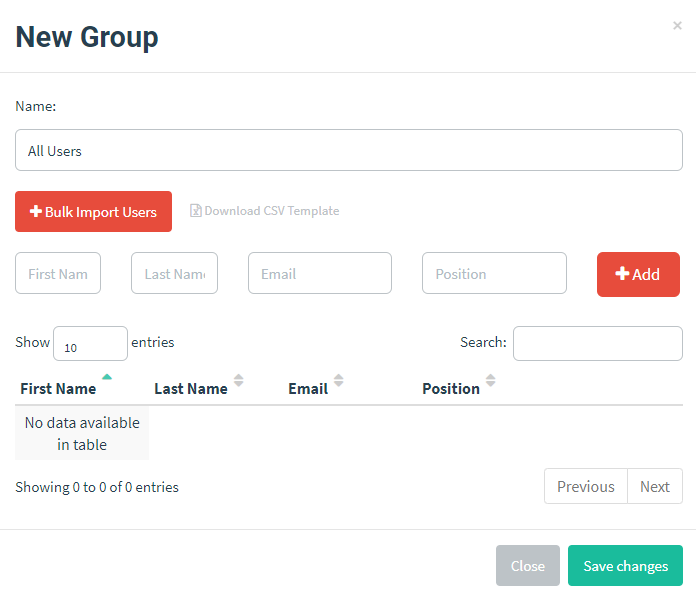
Navigate over to users and groups and press New Group. You can add the entries in one at a time or upload a CSV that uses firstName,lastName,email,position as the header.
If you happen to be using Active Directory AND your keeping it up to date the following Powershell command could be used:
Get-ADUser -Filter * -properties * | Select-object givenName, Surname, EmailAddress, Title
Using custom lists of csv files, you could generate multiple groups within Gophish, ie: by Title, by Department, by Risk, by Location etc
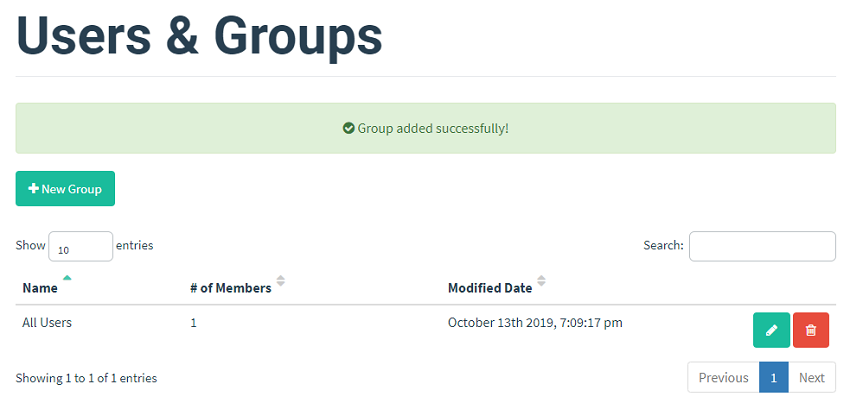
After you press the Save button, you will see a list of the groups that you created. In this case we only have one called All Users.
Setting up an email template
This is the email that will be sent to your end users. Navigate to the Email Templates section
I’m going to setup a LinkedIn phish based off one of the templates from crigs626 on Github. You can import your own email and modify a few settings to make it exact for your requirement. Think about some internal system that you use for instance.
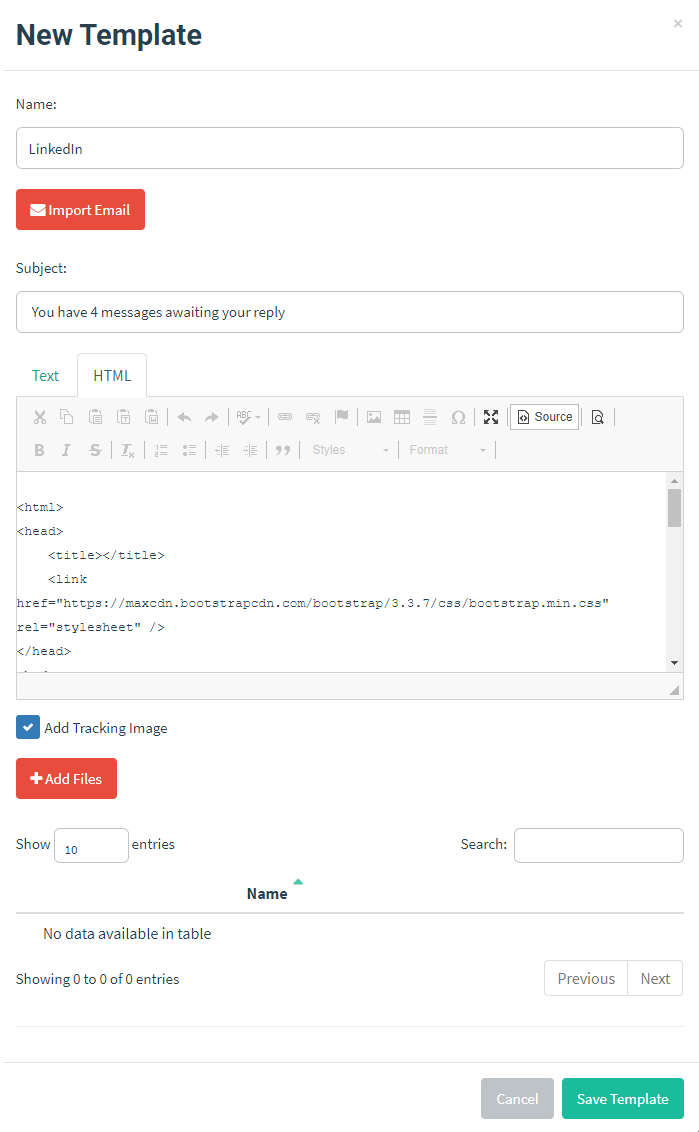
There are a number of tags you can use to further personalise. These can be found in Template Reference Guide
You can store multiple email templates and pick which template you are going to run with when you setup a campaign. For now we will just have this one template.
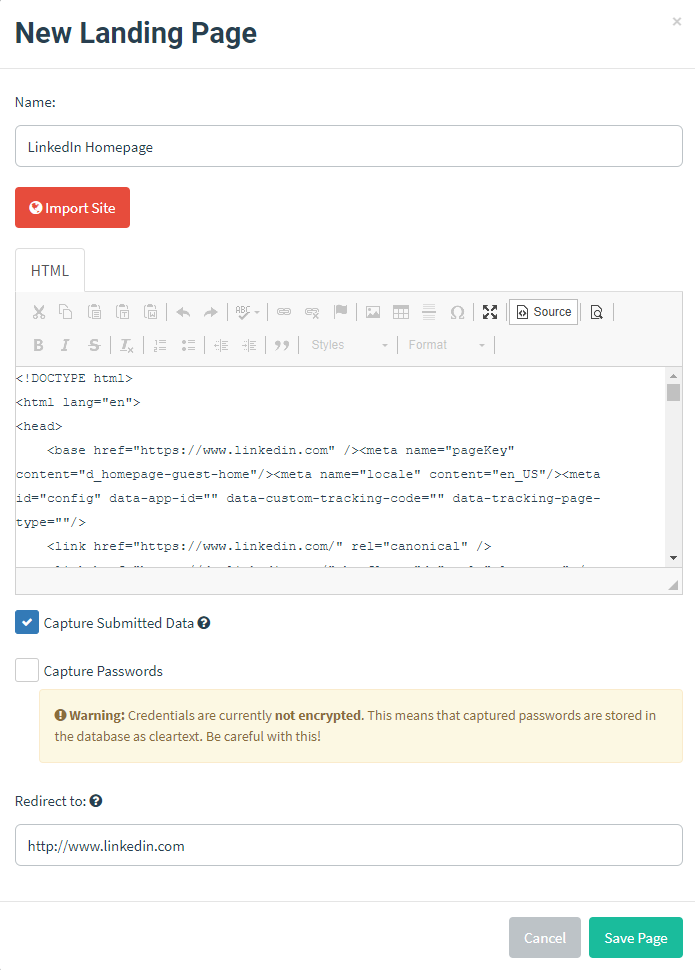
Creating a landing page
Once your user has clicked on the link they will be redirected to the landing page. This could just simply be a page that states they have been phished or even a cloned website that presents a login form. Navigate to the Landing Pages section and press Import Site. Specify a website you want to clone. I’ve ticked to capture submitted data and to redirect after credentials are entered.
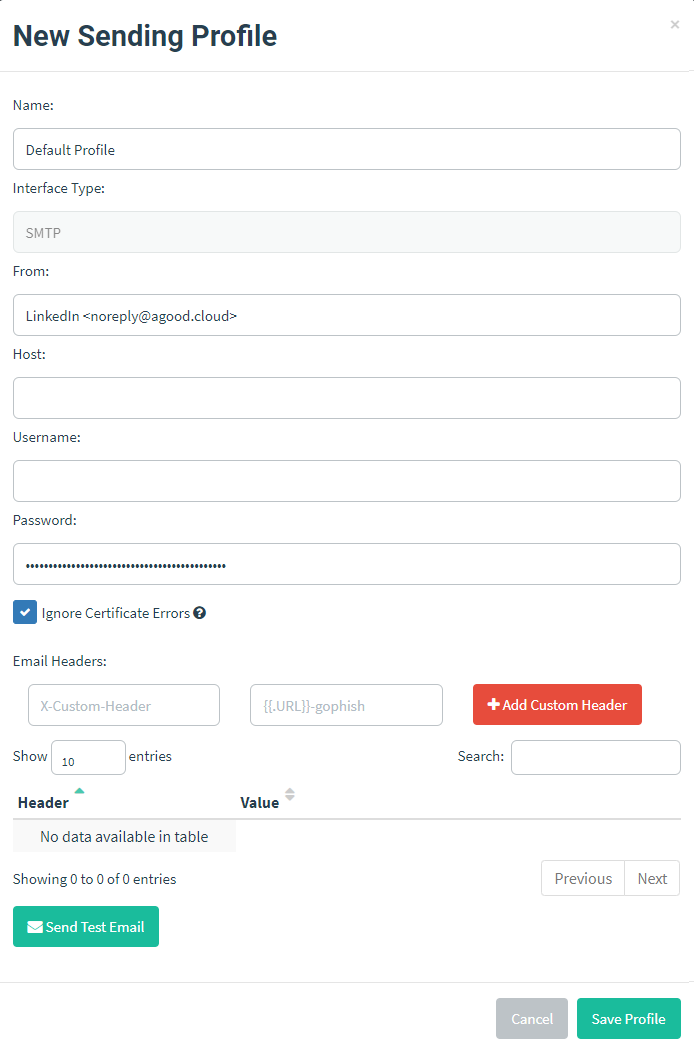
Create a sending profile
The sending profile specifies the sender of the email, the email server settings as well as any custom headers to include. You can send a test email from here to confirm your settings are correct. Navigate to the Sending Profiles section and select New Profile.
Setup a Campaign
With all the pre-requsites setup head over to the Campaigns section and select New Campaign. Select your Email Template, Landing Page, Sending Profile and Groups. You need to enter in the URL of your Gophish listener.
Note: For this to work correctly, this URL needs to be accessable by the victim, so keep that in mind.
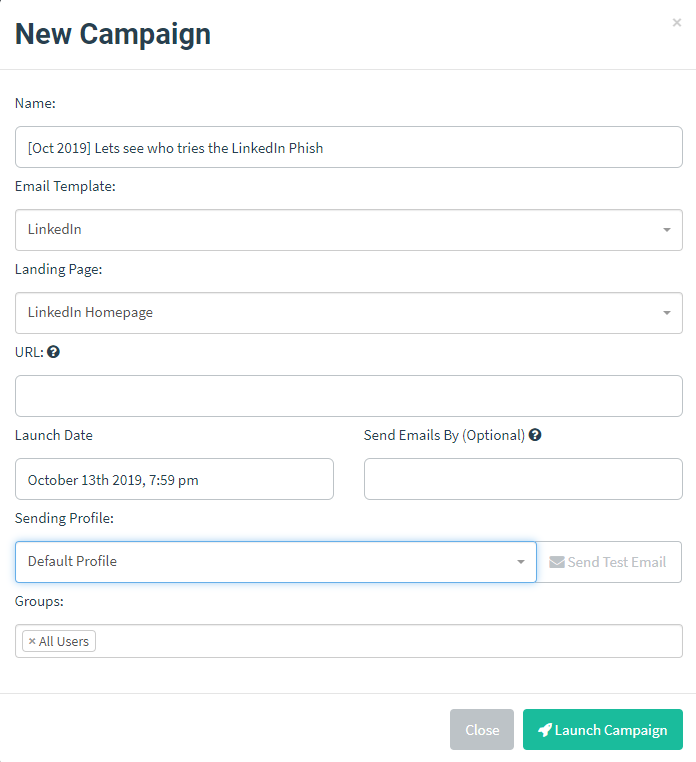
Once you are happy with everything, press the Launch Campaign button. Your phishing emails will start to send.
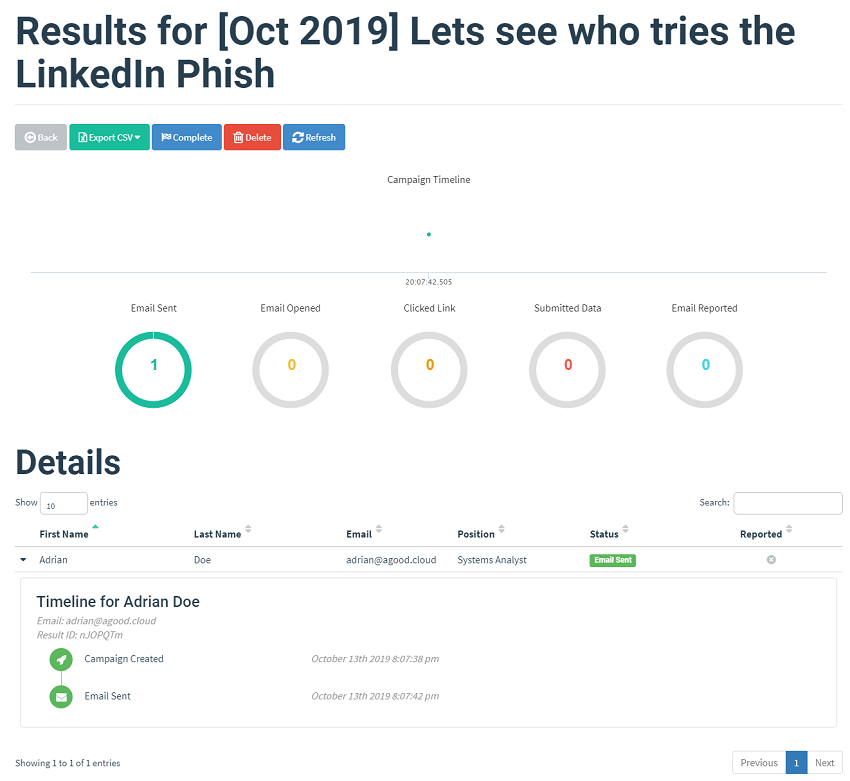
Monitoring the results
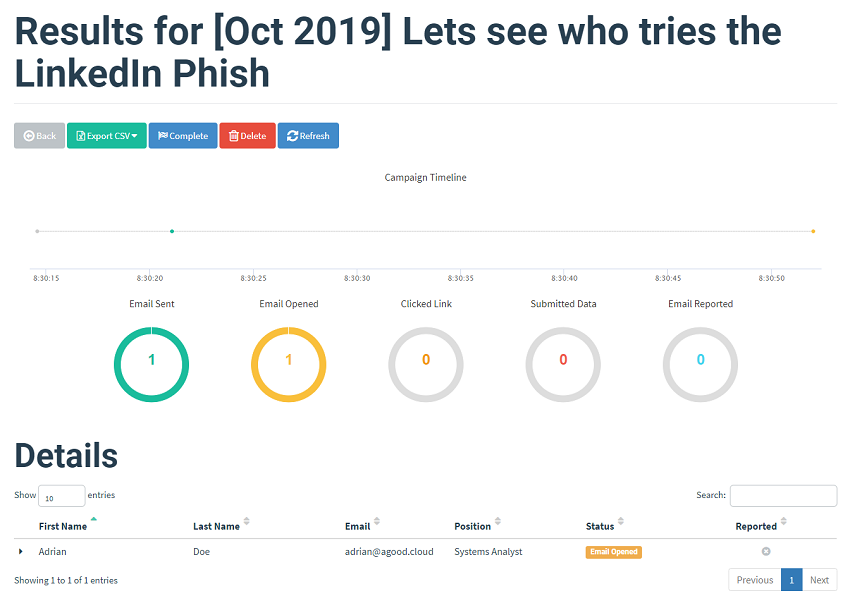
You can track the progress of the campaign from the Campaigns section. This informative dashboard will give you the count of emails sent, opened, links clicked and submitted data and will show you what level of education may be required.
Here are some screenshots of how things escalated:
The 1x1 tracking link from the email triggers the email opened chart
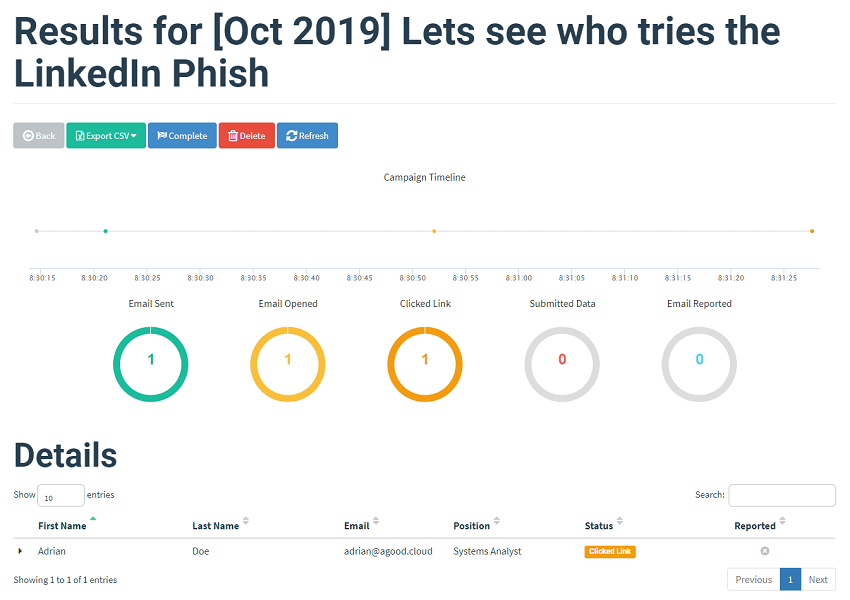
Clicking on the link triggers the link clicked chart. The details of the Operating System and browser used are captured here.
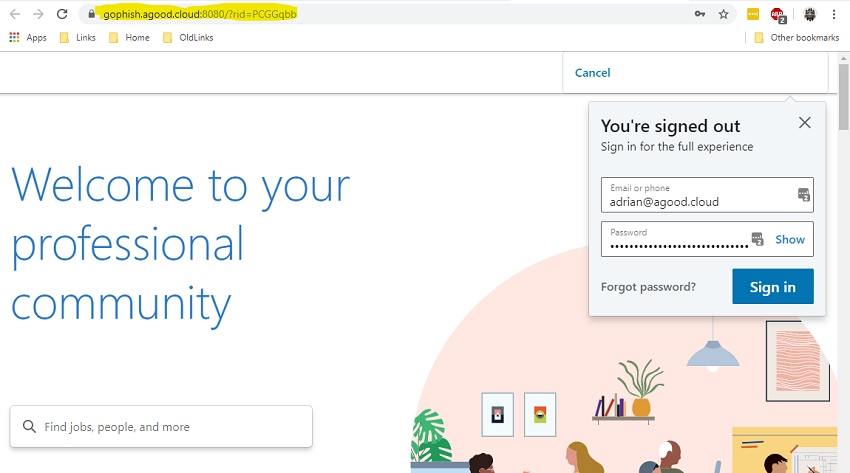
Here is a sample of the fake page
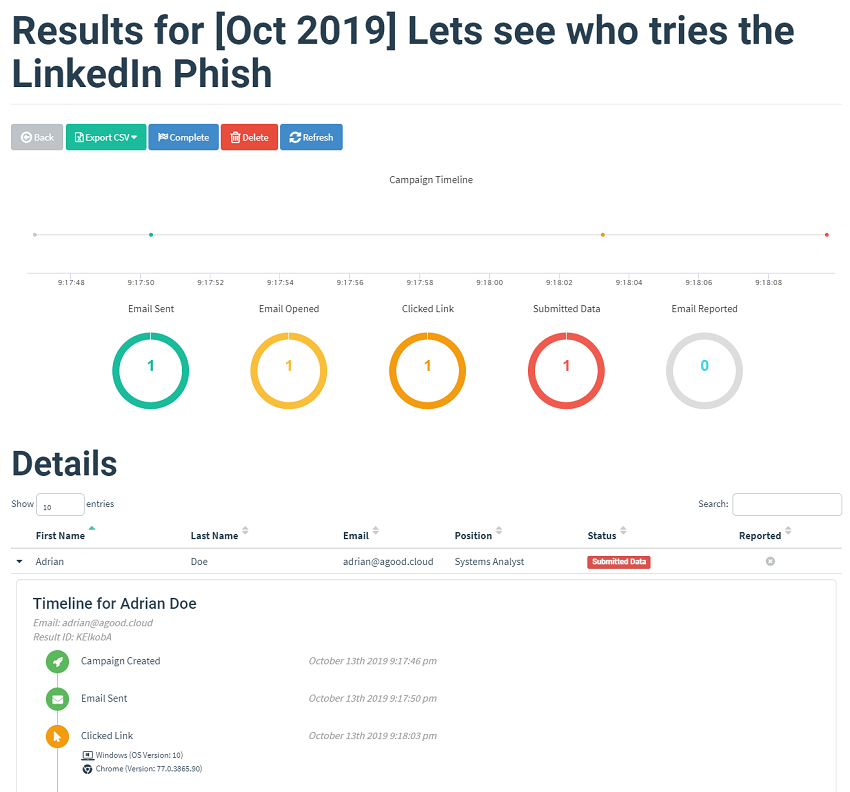
and entering in credentials triggeres the Submittied Data chart.
While there is a way for you to report an email with this framework so it shows on your dashboards, you will need some type of report function within your mail client (or a link within the email for the user to click on, which ahem is what you are trying to discourage)
Conclusion
This is an amazing tool that can be used to educate your users on the dangers of indiscriminate clicking. There even a built in API so that you can automate campaigns. With this tool, It goes without saying, to ensure you are authorised to use phishing simulation tools against your users and only your users.
EDIT: During the setup of this system, one of the posts on github I saw advised against using well recognised brands for your phishing exercies, as this can errode the confidence your users have in these brands. Whoops, but it was too late to go with something else, I was committed ;-)