By Adrian | March 5, 2020
I’ve been a little absent of late. I’ve been quite busy at home having to get a few last minute things, like additional landscaping, pressure cleaning concrete, putting together flat pack furniture for my house in preparation for sale.
Which brings me to why I’m writing this this post. I am a huge UniFi fan having multiple devices in my home network installation which have been flawless since installation. A few of those components include a CloudKey controller and a number of UniFi Protect cameras which naturally became a bit of a selling point for the house.
The CloudKey Gen 2 controller includes a 1TB HDD for recording video from the cameras and is also the software controller for the networking components. As I won’t have a need for the cameras after settlement, I need to prepare the device by moving my networking components to a new linux based controller but keep all the cameras on the existing CloudKey2 controller to leave with the property. I guess the same migration plan could be followed if you were migrating sites from controller to controller.
Prepare Ubuntu VM
I’m not going to cover the steps on building a VM. I have spec’d mine up with the following requirements.
- Minimum 2Gb RAM
- Minimum 50Gb Disk (for historical data)
- Ubuntu Server (Im using 18.04.4 at the moment)
- Latest OS Updates
- Static IP
Install UniFi Controller software
So the first thing I tried was to download directly from the UniFi website based off this article https://help.ubnt.com/hc/en-us/articles/360012282453-UniFi-How-to-Install-Upgrade-the-UniFi-Network-Controller-Software, but as is usually the case, nothing ever seems to go to plan and there are serious issues getting the UniFi controller working with Ubuntu 18.04.4 even though this LTS OS has been out for around 2 years.
After some googling turns out there are dependency issues. Kudos to Glenn AmazedMender16 on the community forums for creating an installation script that pretty much does it all.
Because of Glenn’s work, the installation is as simple as running the a single line command.
Now single liner installs like this should scare the life out of you, so download the script first, ensure it’s not going to do anything silly and that you are happy with first. Don’t say I didn’t warn you.
# Script needs to run as root
sudo -i

# Download the script
rm unifi-latest.sh &> /dev/null; wget https://get.glennr.nl/unifi/install/install_latest/unifi-latest.sh

# Inspect script at this point and you will see a second script is downloaded from https://get.glennr.nl/unifi/install/unifi-5.xx.xx.sh
# Download and inspect that script as well, it is a very comprehensive script for multiple Linux distros

# Execute script
bash unifi-latest.sh
The script does a flawless job installing all the requirements and standing up the UniFi controller
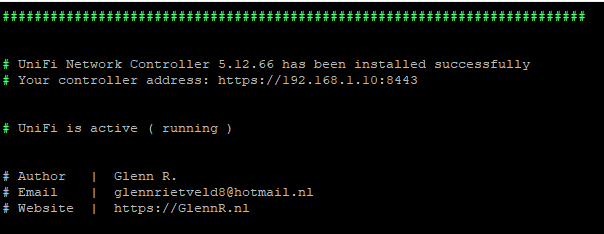
As per the installation script, your UniFi controller access address is specified. Make a note of this.
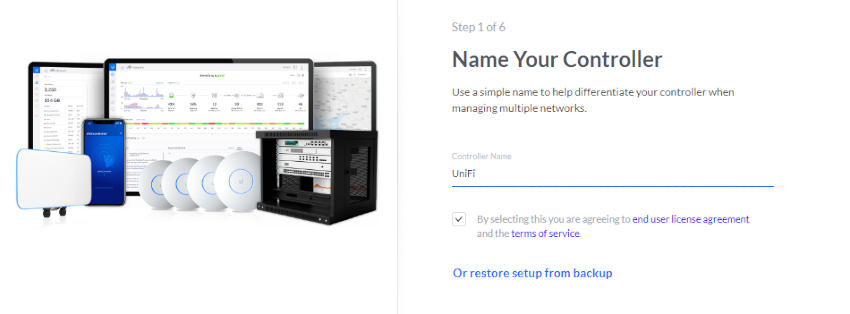
Step through the Setup Wizard of the new installation
Navigate to the controller address via a browser and complete the setup steps.
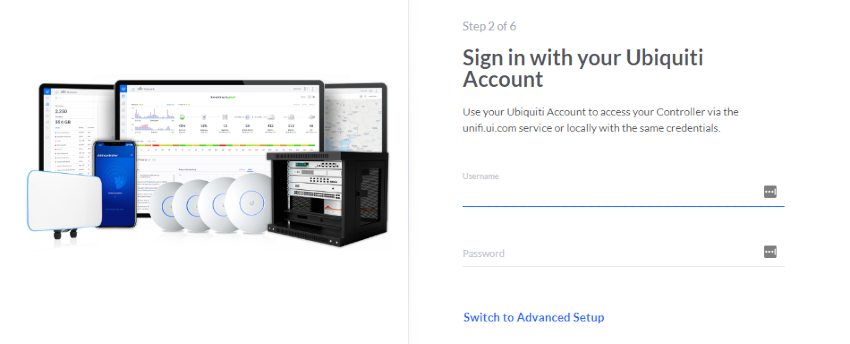
Sign into your UniFi account. You can register an account here https://account.ui.com/register
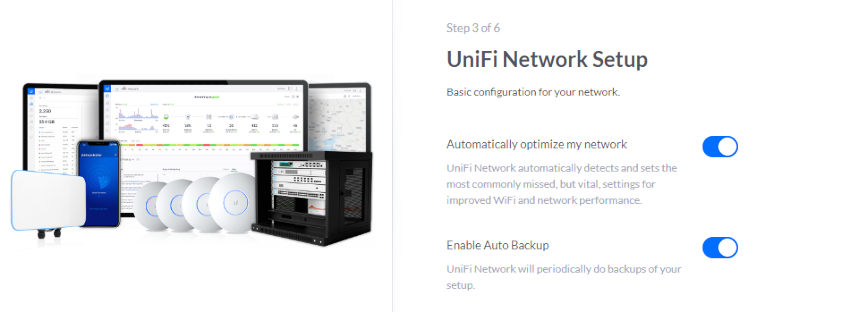
Keep the default settings
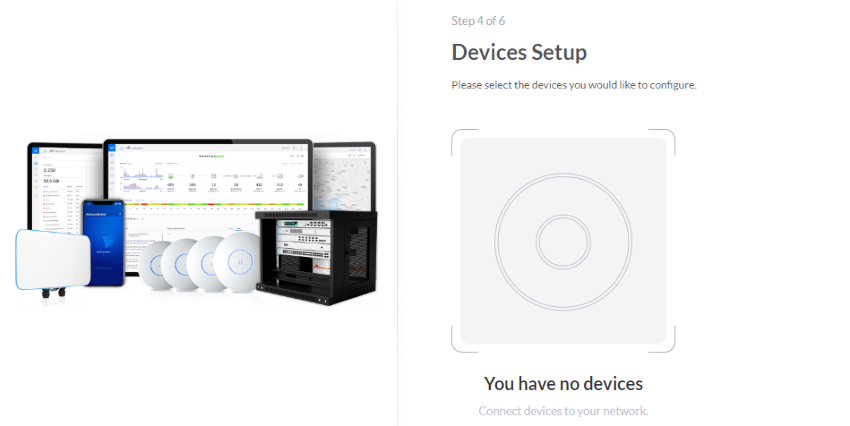
As there are no devices to setup, press Next
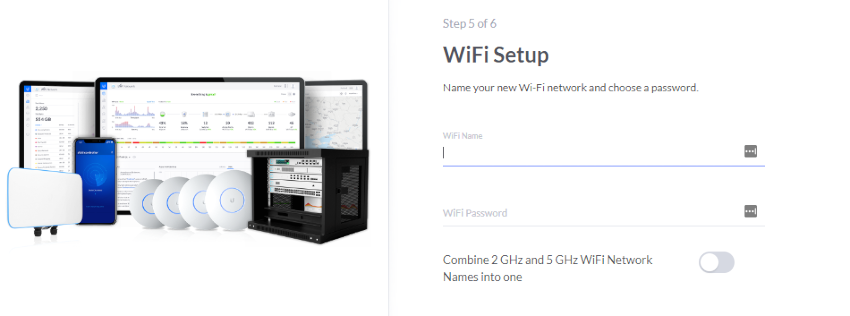
Skip the WiFi setup
Review the configuration and press Finish
Backup the UniFi Site from the existing controller
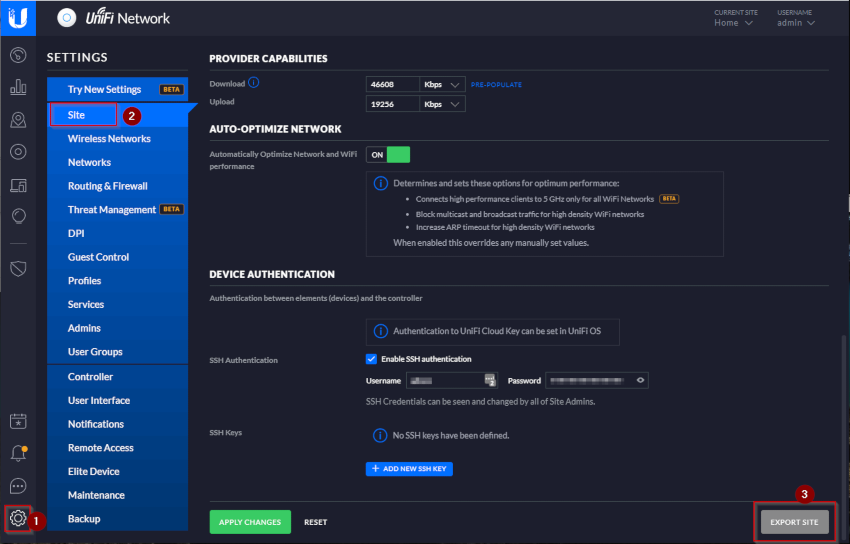
From the existing controller (CloudKey2) select Settings, Site, and then press the Export Site button.
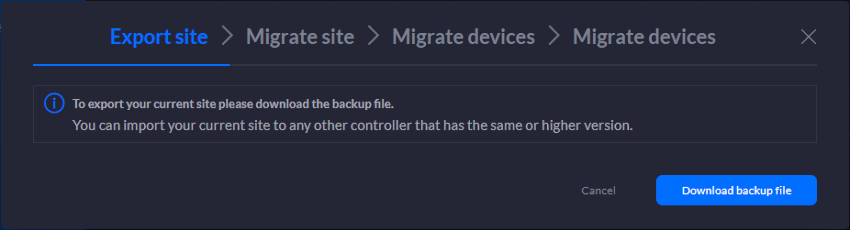
Press the Download backup file button and save the the backup file somewhere safe as you will need to import it in the next step.
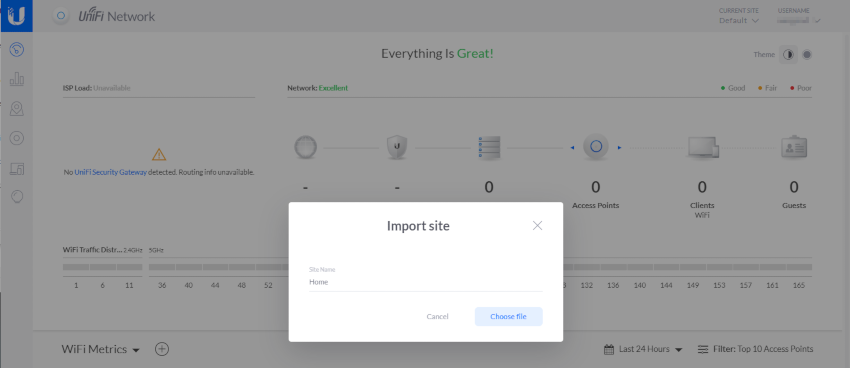
Import the site on the new controller
On the new controller select Current Site, Import site. Press the Choose file button and select the backup that was made from the old controller.
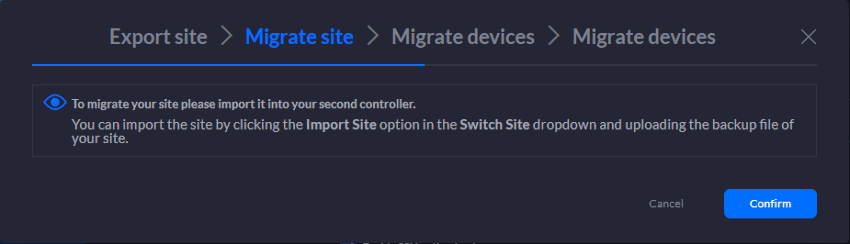
Confirm the action on the old controller
Back on the existing controller select the Confirm button.
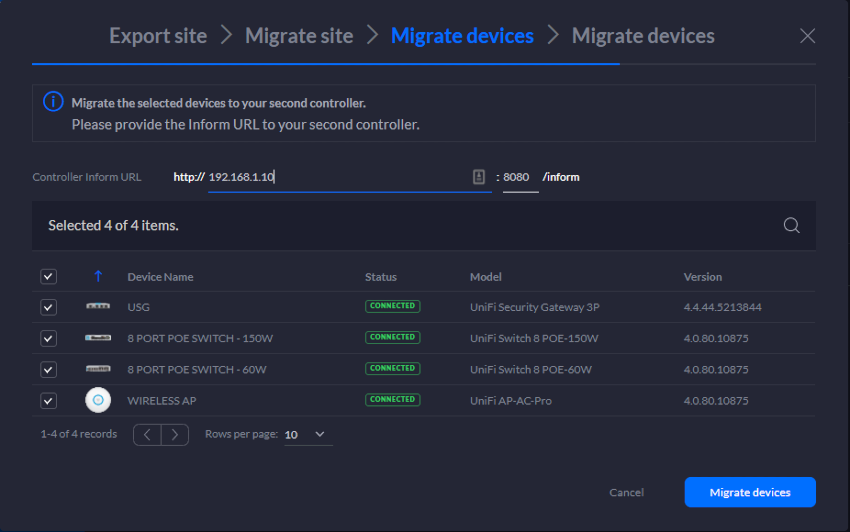
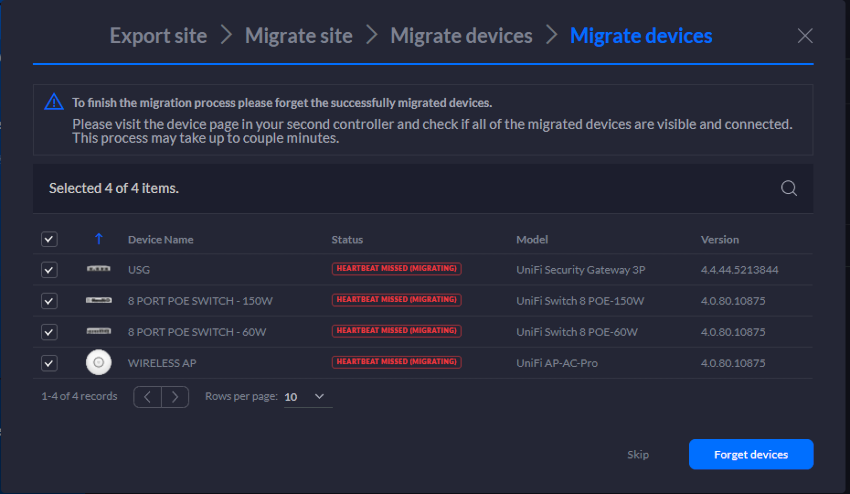
Migrate the devices over to the new controller
Still on the old controller, you need to specify the address of the new controller for the Controller Inform URL, then press Migrate Devices. This step is critical to get correct as it will re-home these devices to the new controller.
Migration in progress
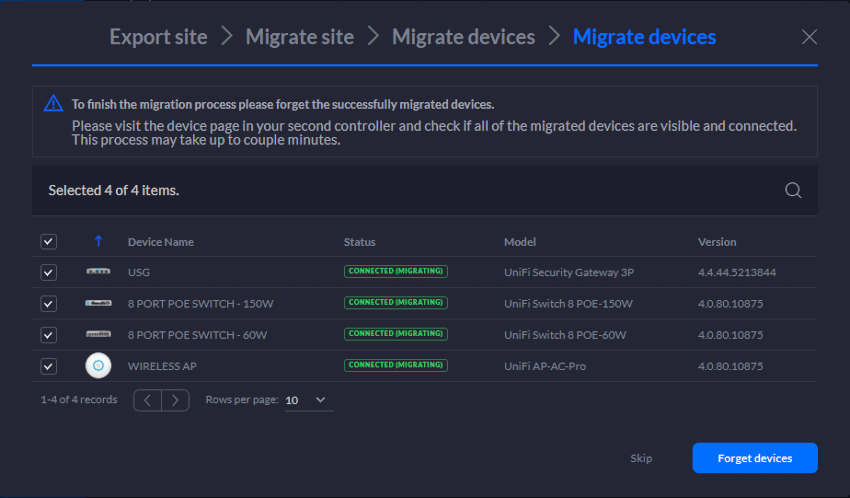
After a minute or so, the devices will fail heartbeat on the old controller and should now appear on the new controller. From here you can Forget devices and the process is complete.
And thats it in a nutshell. Now I need to go about performing a factory reset of the existing CloudKey device and associated cameras and set it up for the new owners.
Crosstalk solutions has an excellent YouTube tutorial as well.