By Adrian | September 4, 2020
One of the most powerful features of TheHive has to be the outgoing webhooks. You make any modification to any case, task, observable etc and if configured, the outgoing webhooks will do with it what you will.
I’ve written a few blog posts about TheHive webhooks, and my platform of choice has been Nodered for this. With a highly extendable and easy to use graphical drag and drop interface, it makes it easier to visualise your workflows. It uses NodeJS under the hood, and you can write your own functions to meet your own custom objectives. You could just as easily use a python listener using Flask on the same server as TheHive, and there are examples of how to do this on TheHive’s github pages. Either way really is fine, but ill be working with NodeRed here.
For this blog post entry I want to go over how you can utilise the incoming webhook of Microsoft Teams to create a MessageCard when a new case is created in TheHive4. I would categorise this as a quality of life improvement. You (cough I mean your boss) may not spend a lot of time logged into TheHive, but may want to see when a new case is created. You could even use a tag to push a case notification to another team’s channel if there is something that is of particular interest to them.
Pre-requsites
While I have written this for TheHive4 platform, the steps will be nearly identical if you are using TheHive3.
- You need to ensure that you have Nodered installed. If you dont have a Nodered instance I have a guide on how to set it up.
- Outgoing Webbooks from TheHive need to be enabled. This is documented in TheHive RC1 to RC2 update or you can get the readme from the offical Github page
Configuring Microsoft Teams
While I find MessageCards can be quite informative on a teams channel, I’ve not come across a way to delete them. Its for this reason I would suggest creating some sort of temporary channel where you can develop and hone your card until its in an acceptable format.
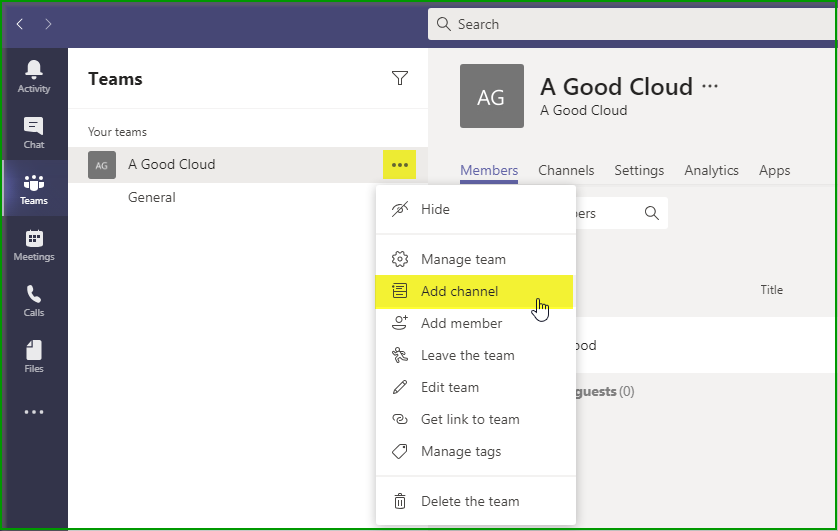
To create a channel click on the 3 dots and select Add Channel.
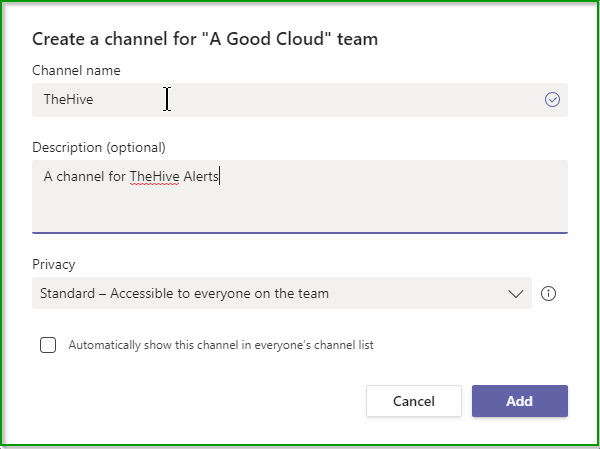
….and give it a name and description.
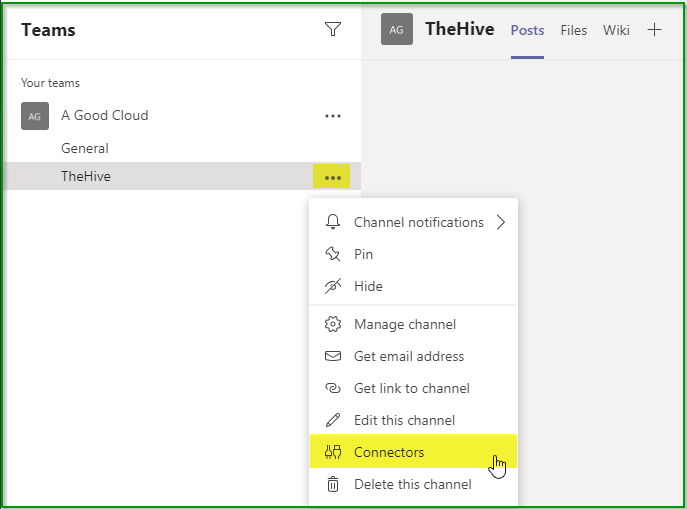
With the new channel created we need to enable the incoming webhook. Click on the 3 dots for the channel and select Connectors.
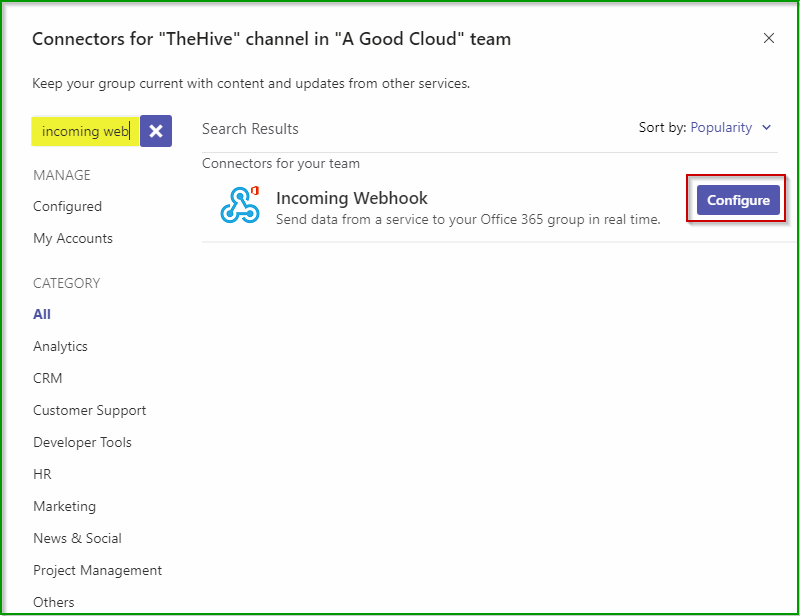
Search for Incoming Webhook or scroll through the list and press the Configure button.
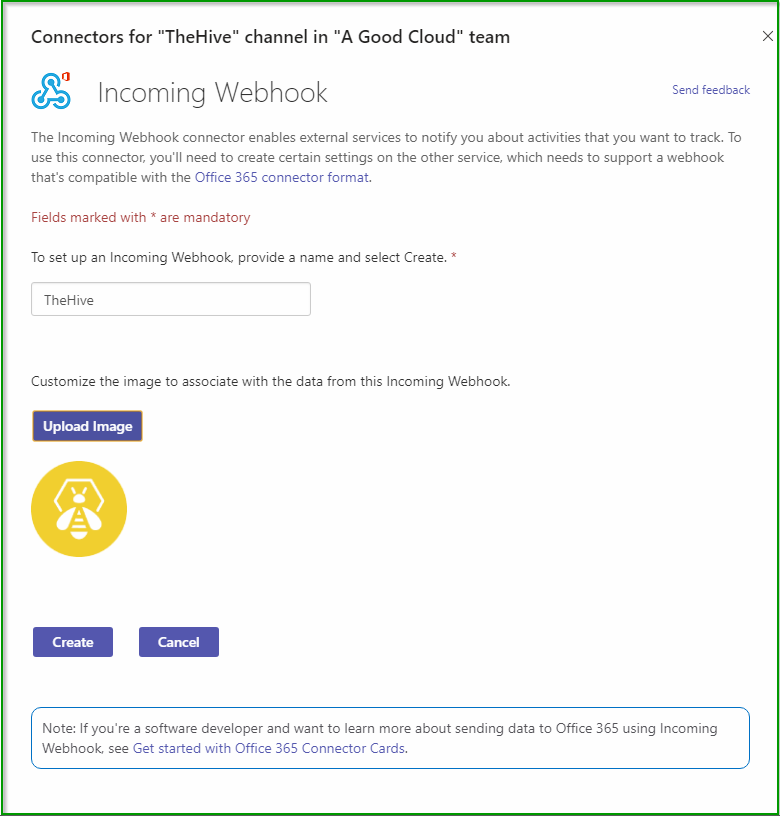
Give the webhook a name and upload an image. Press Create.
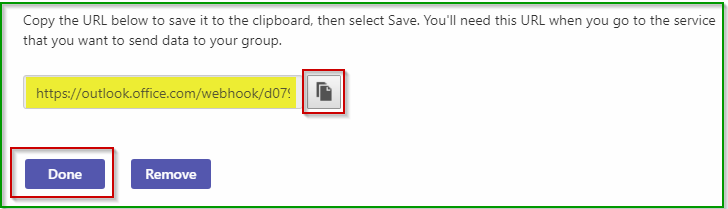
You will be presented with a webhook URL. Press the Copy button and Done. We will use this shortly. Don’t share that webhook URL ;-)
With that out the way, we are all done with Teams for now.
Configure a Flow in Nodered
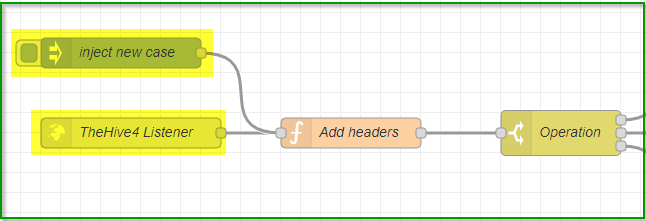
I have created the following flow and put it into my github repository. I have structured it in a way so that I can continue to map out each call, which is why the Operation switch goes 3 ways. The Create switch can then also split into each of various create calls that can be made (ie: case, case_task, case_task_log, alert, user etc). This flow contains everything you need to send a MessageCard into Microsoft Teams.

There are a few things you will need to so, so ill explain each part of the flow here. During my testing I found I was creating case after case, which is fine if you have a dev instance of TheHive to play with, but I found that by creating an inject new case node with the relevant json I could just trigger the flow with a single click as opposed to creating a case each time. Much easier. TheHive4 Listener is where the event is received from the outgoing webhook from TheHive. Its the entrypoint.
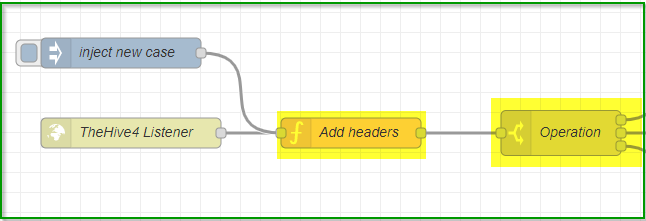
On the Add Headers node you need to double click and paste in what your Microsoft Teams incoming webhook URL is. This will be passed down the flow as the URL. If you want to use multiple outbound requests (ie: send to cortex, or query TheHive API or tap into some other service), then you would create variables for them here as well. The Operation switch looks at what the incoming request wants to do. In this case, our operation is Create, but you may wish to perform other options when the action is update or delete.
I have included a sample payload here to illustrate this part of the flow. It looks at the operation and objectType to determine where to send this request. As there are many different objectType that can come through create is setup as a switch.
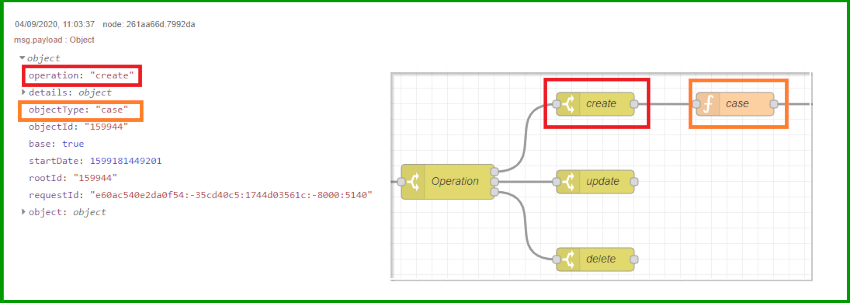
The final and most important parts of the flow happen in these 3 nodes.
When the payload arrives, there are certain values like tlp, pap, severity that just come in as numbers. This isn’t going to be friendly for the card thats generated, so we convert them in the create custom object function. In this function we also generate some custom fields such as the title, link, tlp_image and space delimiting the tags array. These are then passed along.
We do this by creating a custom object inside the payload to hold the values we are wanting to pass into the actual card (which is the next function). Using the switch() statement we can add in our friendly names. It would be here that we would add any additional information we want to include. For instance, I have also specifed what image I want to use for TLP. You could just as easily change this code so that the image presented is the urgency. Another example could be, if your cases had a SLA attached to a severity, you could code in and extra note for this.
msg.url = msg.teams;
msg.payload.custom = {}
msg.payload.custom.link = "https://thehive4.agood.cloud/index.html#!/case/" + msg.payload.details._id + "/details";

switch(msg.payload.details.severity) {
    case 1:
        msg.payload.custom.severity = 'Low';
        break;
    case 2:
        msg.payload.custom.severity = 'Medium';
        break;
    case 3:
        msg.payload.custom.severity = 'High';
        break;
    case 4:
        msg.payload.custom.severity = 'Critical';
        break;
}

switch(msg.payload.details.tlp){
    case 0:
        msg.payload.custom.tlp_image = 'https://www.us-cert.gov/sites/default/files/tlp/tlp_icons_small/TLP-ICONS_RGB_WHITE_sm.png'
        msg.payload.custom.tlp = 'White'
        break;
    case 1:
        msg.payload.custom.tlp_image = 'https://www.us-cert.gov/sites/default/files/tlp/tlp_icons_small/TLP-ICONS_RGB_GREEN_sm.png'
        msg.payload.custom.tlp = 'Green'
        break;
    case 2:
        msg.payload.custom.tlp_image = 'https://www.us-cert.gov/sites/default/files/tlp/tlp_icons_small/TLP-ICONS_RGB_AMBER_sm.png'
        msg.payload.custom.tlp = 'Amber'
        break;
    case 3:
        msg.payload.custom.tlp_image = 'https://www.us-cert.gov/sites/default/files/tlp/tlp_icons_small/TLP-ICONS_RGB_RED_sm.png'
        msg.payload.custom.tlp = 'Red'
        break;
}

switch(msg.payload.details.pap) {
    case 0:
        msg.payload.custom.pap = 'White';
        break;
    case 1:
        msg.payload.custom.pap = 'Green';
        break;
    case 2:
        msg.payload.custom.pap = 'Amber';
        break;
    case 3:
        msg.payload.custom.pap = 'Red';
        break;
}

msg.payload.custom.title = "New Case Alert: Case #" + msg.payload.details.number + " - " + msg.payload.details.title
msg.payload.custom.tags  = (msg.payload.details.tags).join(' ')

return msg;
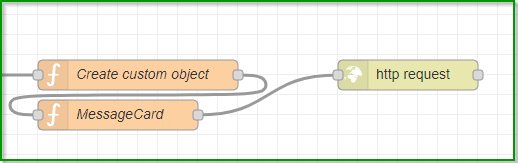
The creation of the card to send into Microsoft Teams is done in the MessageCard function. I tried to set this up as a Nodered template, but I just couldnt get it working, so I went with a function. While you could merge both the Create custom object and MessageCard functions together, I chose to seperate them for readability.
The actual MessageCard code is as follows. Note that we are passing in our customisations (msg.payload.custom.*) and the facts node contains most of the goodness. The Incoming Webhooks is limited in that I dont beleive you can use the more modern Adaptive Cards. But the idea here is to just create an alert in Teams.
msg.payload = {
    "@type": "MessageCard",
    "@context": "http://schema.org/extensions",
    "themeColor": "0076D7",
    "summary": "New case created in TheHive",
    "sections": [
        {
            "activityTitle": msg.payload.custom.title,
            "activityImage": msg.payload.custom.tlp_image,
            "activityImageType": "article",
            "activitySubtitle": msg.payload.details.description,
            "facts": [
                {
                    "name": "Severity",
                    "value": msg.payload.custom.severity
                },
                {
                    "name": "Status",
                    "value": msg.payload.details.status
                },
                {
                    "name": "Created By",
                    "value": msg.payload.details._createdBy
                },
                {
                    "name": "Assigned to",
                    "value": msg.payload.details.assignee
                },
                {
                    "name": "TLP",
                    "value": msg.payload.custom.tlp
                },
                {
                    "name": "PAP",
                    "value": msg.payload.custom.pap
                },
                {
                    "name": "Tags",
                    "value": (msg.payload.details.tags).join(' ')
                }
            ],
            "markdown": true,
        }
    ],
    "potentialAction": [
        {
            "@context": "http://schema.org",
            "@type": "ViewAction",
            "name": "View in TheHive",
            "target": [
                msg.payload.custom.link
            ]
        }
    ]
}
return msg;
The final step sends the data into the http request node which is where we POST the data to Teams. You will notice that there is no URL specified in this node. This was actually set as msg.url back in the Create Custom Object function (Line 1), which was set even earler as msg.teams in the Add Headers function.
The End Result
If you have configured this correctly, when you create a new case in TheHive, Microsoft Teams will present something similar to this.
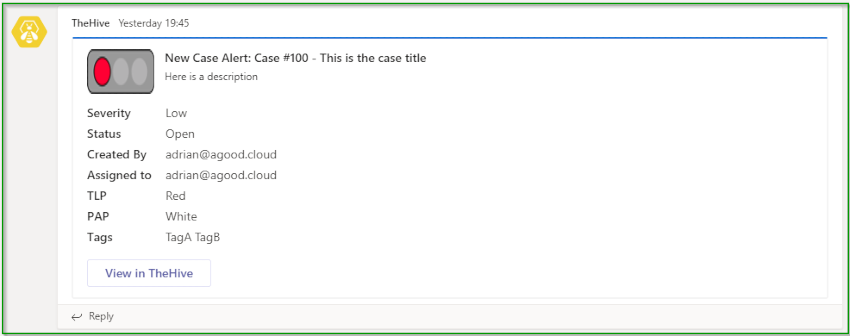
If you click on View in TheHive, the generated URL will take you to the case. Although if you need to login you will need to click this again after you have authenticated.