By Adrian | July 2, 2022
When it comes to online applications some of the best functionality comes when you can programmatically tap into it as it creates countless opportunities to customise and extend the functionality to suit your needs without having to modify the underlying application.
In the Context of TheHive, the API will allow you to query, post or search data which can aid in the lifecycle of an incident as well as create alerts and cases programmatically. The functionality doesn’t quite stop there though. You could build a script that pulled data from TheHive and then pushed that into another platform such as a Threat Intelligence platform.
While API’s are great, the real power in TheHive5 is through outbound webhooks where event based notifications are sent out a webhook interface. With a small amount of configuration TheHive can be setup for this. Unlike TheHive v4 (and v3 before it) which required modifying a configuration file with precision, its all now done in a settings page easier than ever before and much less prone to human error.
Given the choice of logging into a system to manually extract data vs running for instance a Powershell or Python script, The preference has to be a webhook, everytime.
Here are the steps required to setup Webhooks in TheHive. For this particular setup n8n will be used to receive the event for processing.
Before you begin
It helps to have the following details ready before you start
- An OrgAdmin account for the organisation you wish to setup the webhook for
- The incoming http(s) webhook for the receiving system you want to send the alert to
Enable the webhook endpoint
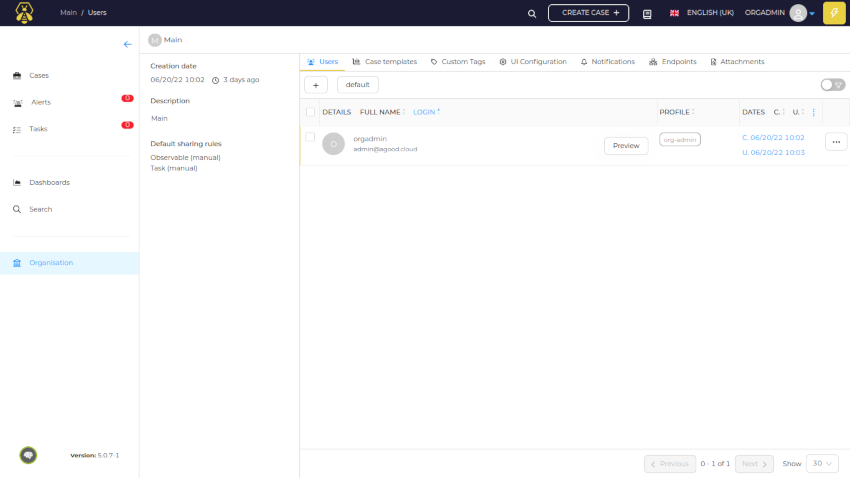
Using the orgadmin account, login to TheHive and select Organisation from the left hand pane.
Select Endpoints from the menu tab.
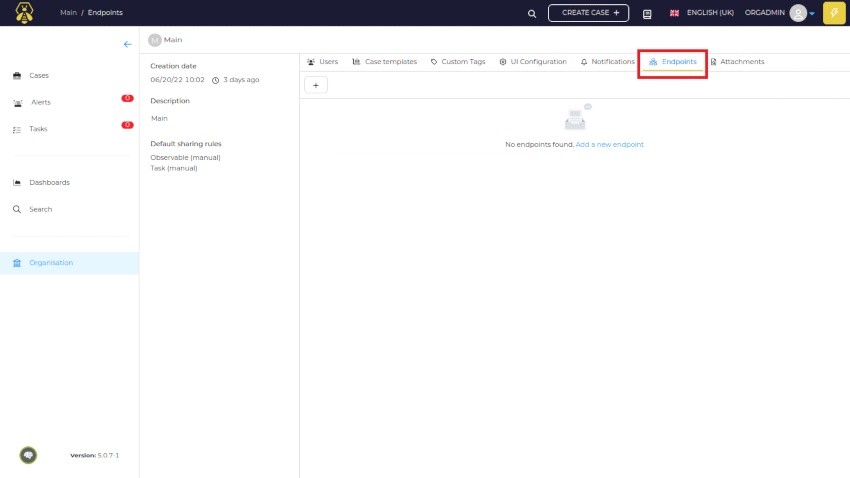
Select Add a new endpoint or use the + symbol.
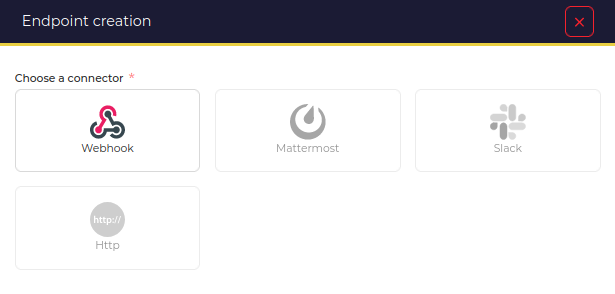
Note: The community edition will only allow you to select webhook.
Enter in the Name, URL and Version details.
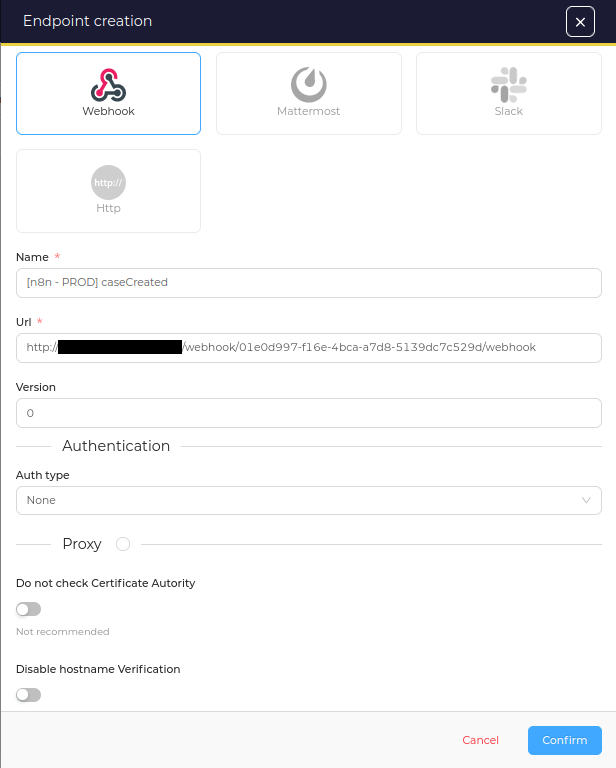
With the endpoint configuration complete we can now reference it in the next part notification configuration.
Enable the per event notification
Navigate to the Notifications tab.
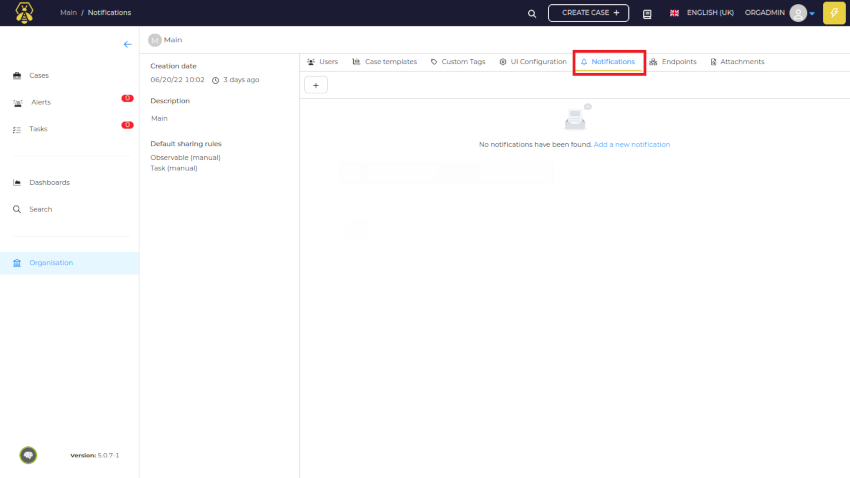
Select Add a new notification or use the + symbol.
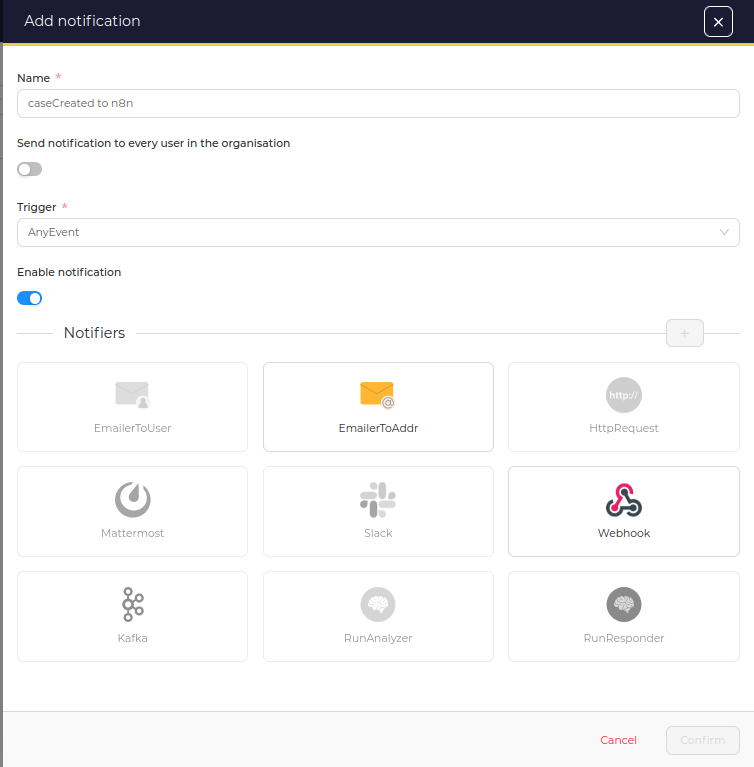
Enter in the Name, select one of the available Triggers and select Webhook. In this example CaseCreated is being used.
There are 12 available triggers to select from:
- AnyEvent
- FilteredEvent
- CaseClosed
- CaseCreated
- CaseShared
- AlertCreated
- AlertImported
- JobFinished
- ObservableCreated
- LogInMyTask
- TaskAssigned
- TaskClosed
It is best to be as granular as possible to keep things modular. If you select Any Event you would need to accomodate for that downstream.
Note: The community edition will only allow you to select EmaillerToAddr or Webhook.
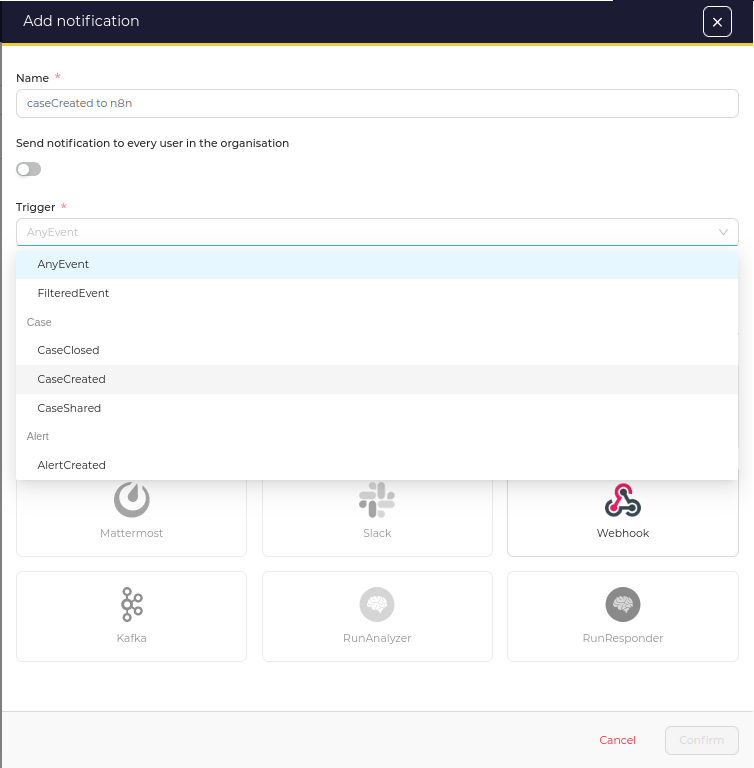
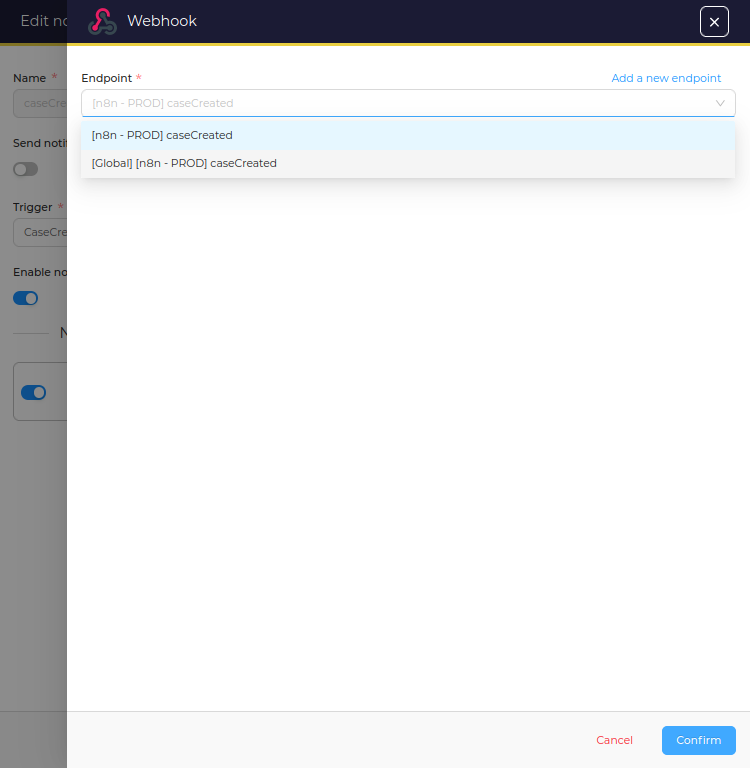
When Webhook is selected, select the Endpoint that was created in the previous step and Confirm.
Press Confirm again to complete the notification setup.
Test that it works
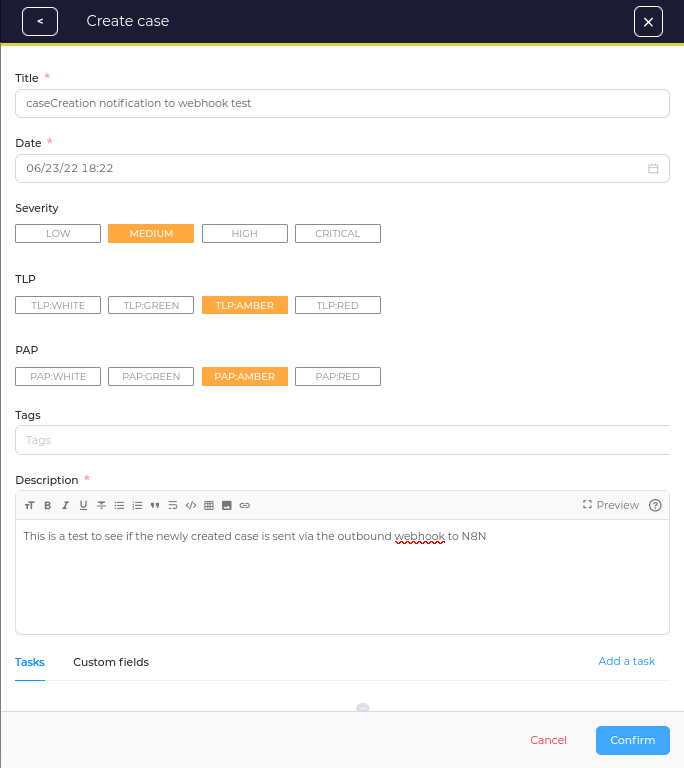
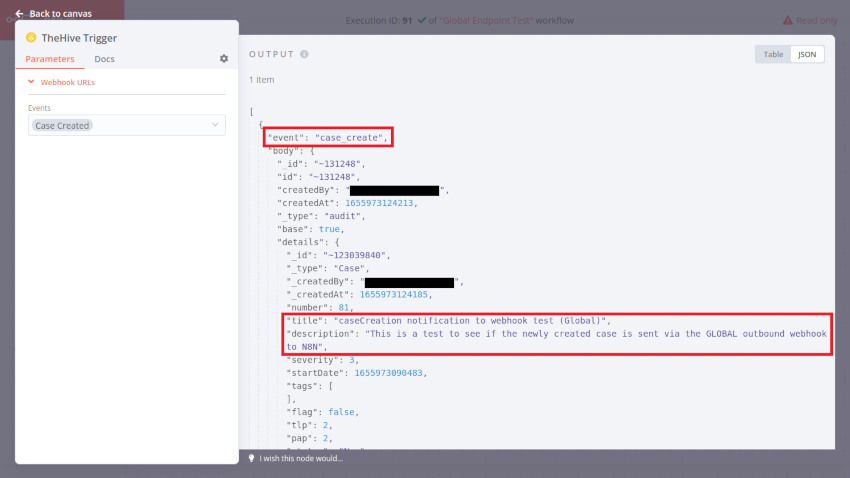
With the Webhook and Notification for CaseCreated setup we can test that its working as expected by creating a new case in TheHive.
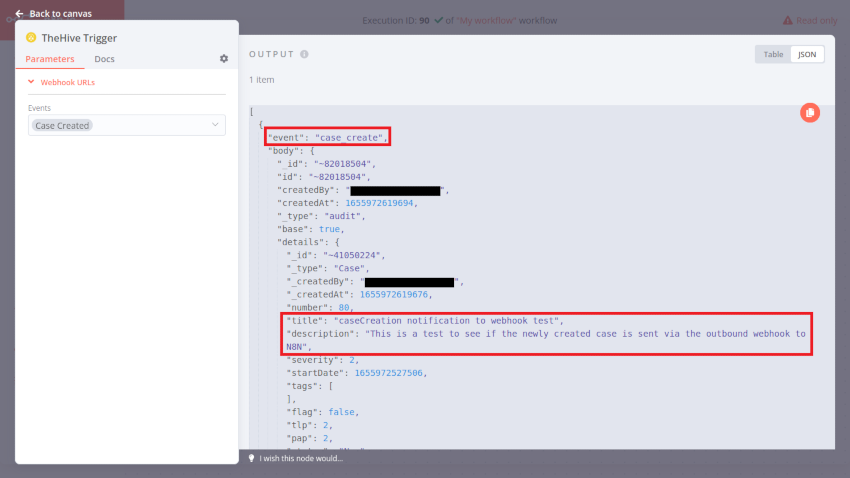
In the n8n console we can see the case_create event as well as the Case Title and Description in the json. The details in the json can be used in an automation playbook.
For the Multi-Tenant setup - Global Endpoints
If you are running multiple organisations for testing or each IT business unit has a tenant in TheHive you can configure TheHive with a Global Endpoint that can be consumed. The configuration process is much the same.
This could be of value for instance if you wanted to run automated playbook analysis on any observable from any tenant to distribute your own curated threat intelligence feed. The tenant would still need to opt-in and configure their selected notifications to use that endpoint.
To configure a Global Endpoint use the admin account for the default tenancy. Navigate to Platform Management.
Select Global Endpoints from the menu tab.
Select Add a new notification or use the + symbol.
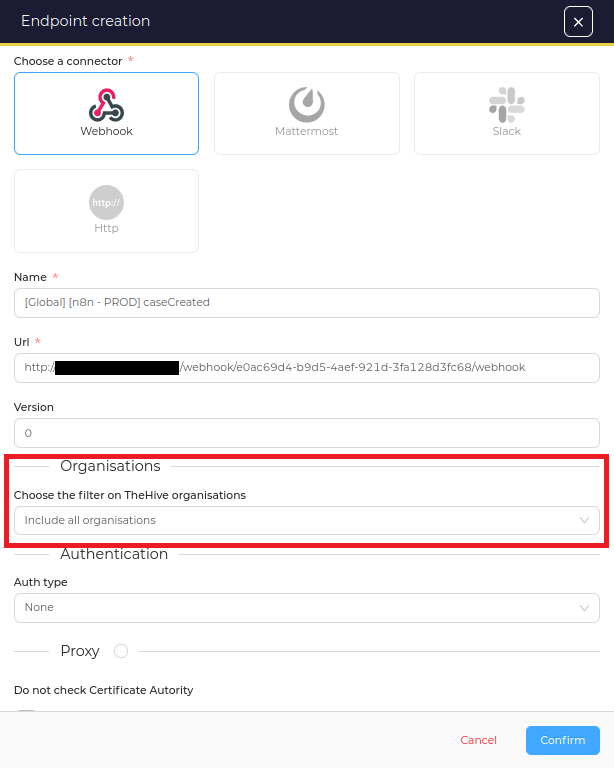
The only difference is the Organisation section has an option to select which organisations the endpoint applies to.
You can apply the endpoint to:
- Include all orginisations
- Include specific orginisations
- Exclude specific orginisations
After the Global Endpoint is setup, the endpoint becomes selectable in the other tennancy, where you add the notifications.
Creating a new case has the same result and we can see the output in n8n.
Troubleshooting
Sometimes things just don’t work as expected. In terms of troubleshooting you want to ask the following questions and trace end to end to find the problem.
- Is the webhook address configured correctly in TheHive
- Has the correct API version been configured
- Are the appropriate notifications enabled in TheHive
- Is the event notification leaving TheHive (check application.log)
- Is the destination server/url accessible from TheHive server (can you
ping/curl) - Is the destination server listening for a request
- Can the incoming webhook on the destination be triggered manually (
curl/postman)
Happy incident responding!