By Adrian | December 5, 2019
Security Orchestration and Automated Response (SOAR), its the natural evolution of where security teams are heading, and as our numbers in this space seems to never be enough, we look to SOAR tools to automate to free up our time to so we can spend it doing more productive things, like drinking coffee and threat hunting. Automation brings standard and repeatable processes which could just buy us that breathing space. I’m not a huge fan of full automation for everything, because you could inadvertently end up taking an action that brings down your environment, then you will be drinking coffee for all the wrong reasons as you work to recover!
In this post I want to show you that you don’t need a large budget to punch above your weight and that you can have an inexpensive SOAR tool without the cost by using TheHive, Cortex and Microsoft Power Automate (AKA: Microsoft Flow). Is this sort of a solution for everyone? no, but neither is a fully fledged SOAR platform, so you work with what you have within your constraints.
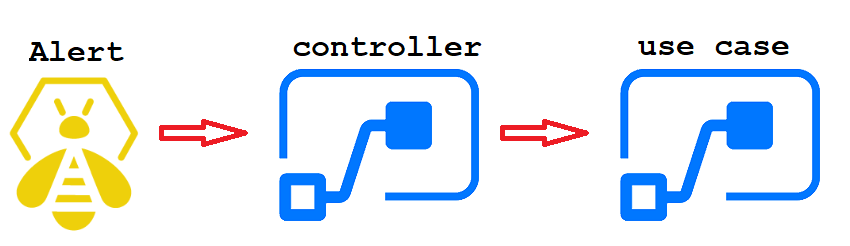
This is the high level overview
Now as there is a requirement for Microsoft Power Automate you will need a licence for this, so there will be a cost involved. Your workplace may already have the appropriate licensing in place, so its best to discuss with your IT team.
Microsoft Power Automate gives you a large range of integrations where you can send emails, get user details (and manager details), wait for authorisations, post to various chat platforms like Microsoft Teams, add tickets to ticketing systems and the part that makes this all possible….. add HTTP endpoints and requests.
You will also need some way of generating Alerts in TheHive as these workflows are triggered via alerts. The idea being that you make the decision to promote an alert to a case based off the action of the automation. I’ve got a python script that can generate dummy alerts for this demo.
As we are going down the marginal cost route here, there is a going to be a trade off. You may need to further customise the Cortex Responder and create your own workflows within Power Automate (this tradeoff means you get to make your workflow exactly how you need at the expense of your time). Each use case you want to put into place may result in code changes to the responder which is why I plan on just adding it to my github repo, unless I can figure out a way of making it generic enough to see if I can get it added to the main project repository.
Think about your use cases
Whatever security device/appliance/endpoint you want to tap into will require an API endpoint or some way of programmatically configuring it. Some good use cases include:
- Triggering off an online forensic analysis of an endpoint
- Asking users to confirm if they accessed a suspicious email
- Having a system administrator confirm they entered that
mimikatzcommand on the command line. - Blocking an IP address on Firewall
- Closing down a port on a network switch
- Adding a File Hash to block on an EDR solution
- Adding a malicious URL to your proxy blocking list/DNS sinkhole
- Responding to various alerts generated by Cloud Infrastructure Services
It goes without saying, but any configuration of your devices will be on you at your own risk! your own development of workflows, your own testing and your own implementation. Misconfigurations may result in outages, but the worst you could do with this demo is email everyone in your org if you used that email address!
Create the Use Case Workflow
We work backwards here and create the workflow of our use case first, then create a shared workflow that ties it together.
Login to https://flow.microsoft.com and select Create, Automated Flow and skip the popup for Build and Automated Flow. Were going to do this ourselves.
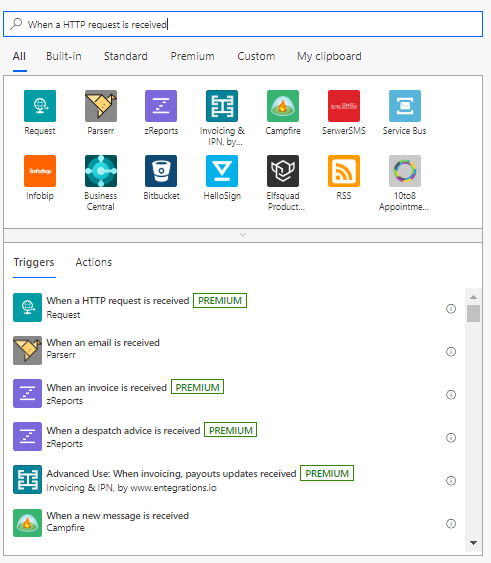
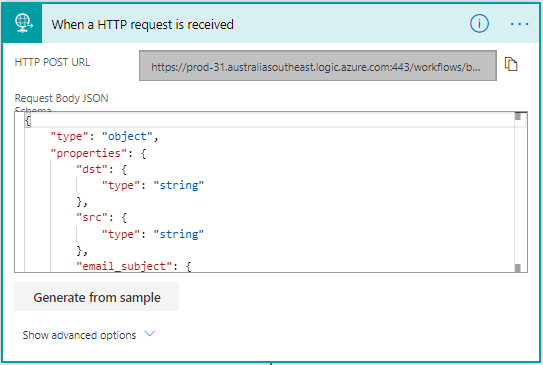
Perform a search for When a HTTP request is received and select it from the Triggers part of the screen.
Now we need to tell this trigger how our data is going to come in via JSON. This is partly the reason why you may need to some additional coding depending on what is in your Alert in TheHive. You can add any additional fields to this later on, and even get fancy with arrays and objects. To match the code in the responder copy this block into the Request body JSON and press the New Step button:
{
    "type": "object",
    "properties": {
        "dst": {
            "type": "string"
        },
        "src": {
            "type": "string"
        },
        "email_subject": {
            "type": "string"
        },
        "use_case": {
            "type": "string"
        },
        "alertId": {
            "type": "string"
        }
    }
}
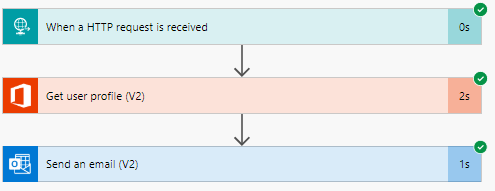
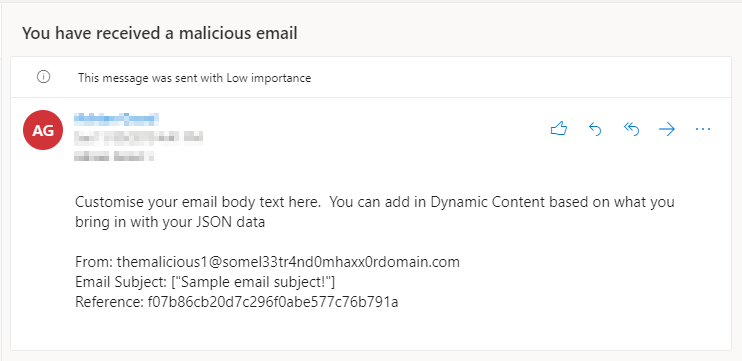
For this demo, we will email the user and tell them that they received a malicious email, but you could do all sorts of things such as ask them if they entered in any details, clicked on a link via a response button, or send an escalation alert to someone if they don’t respond. To do this we need to find the users email address so add in the Office 365 Get User Profile action.
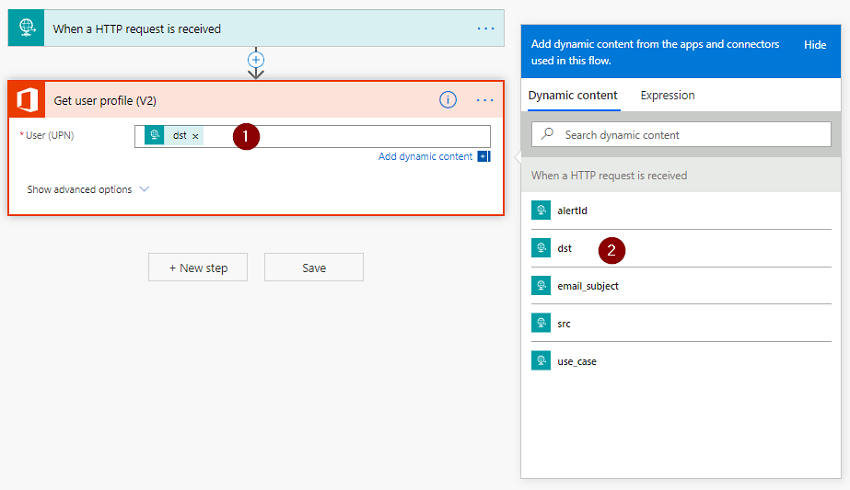
- Select
User (UPN) - Select the
dstfield from the Dynamic Content window
Add in a New step. Search for Send an email (V2)
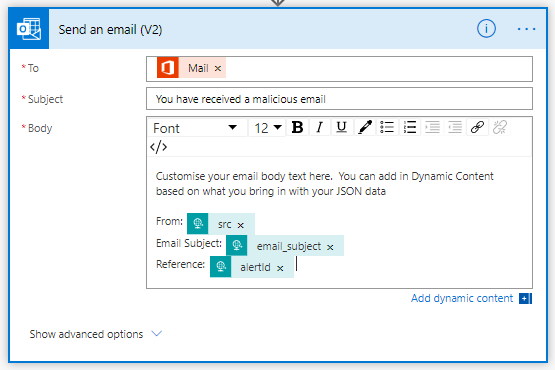
Using the Dynamic Content window populate the various fields.
Save this flow and give it a friendly name. After you have done that expand the first step and copy the HTTP POST URL as we will require this in our Controller flow.
Create the Controller flow
Now that we have a basic workflow completed we need to create the Controller workflow. From the main Power Automate screen, select Create, Automated Flow and skip the popup for Build and Automated Flow.
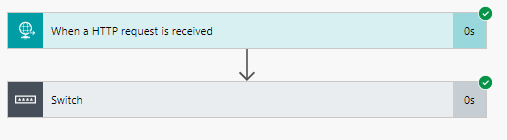
Repeat the same steps as before by adding in the When a HTTP request is received trigger and paste in the same JSON block in the Request body JSON. Press the New Step button.
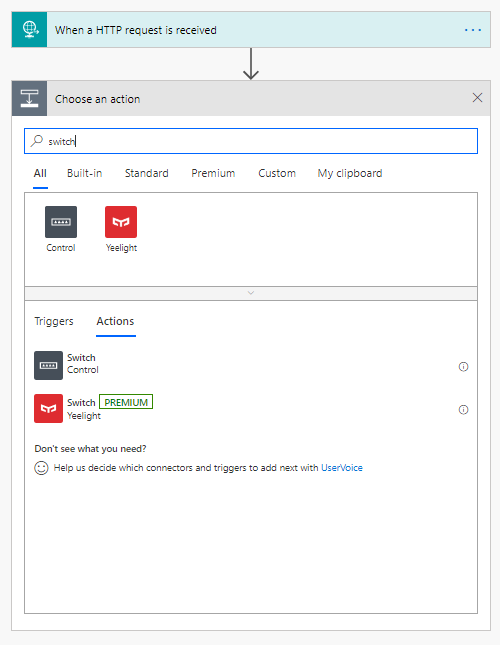
Because we intend on using this flow as the “Controller” to other flows we need to look at the incoming data and make a decision based on the use case. To do this add a Control switch.
- Select the
Onfield on theSwitchcontrol - Select
use_casefrom theDynamic Contentwindow (this is presented as it is a part of the JSON you just added) - Enter your use case string name (in this ase
Phishing email)
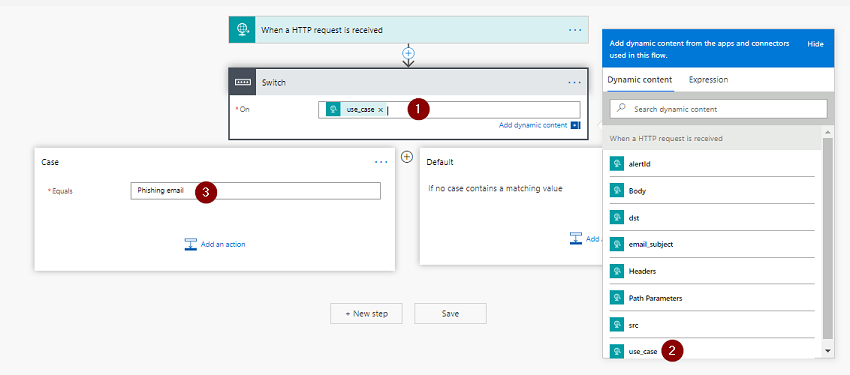
We have basic routing now. When the incoming request JSON matches that of Phishing email in the use_case field, we will send the request to the Phishing workflow that we previously created.
In order to do that on the Phishing email branch, press Add an action, and add in the HTTP action.
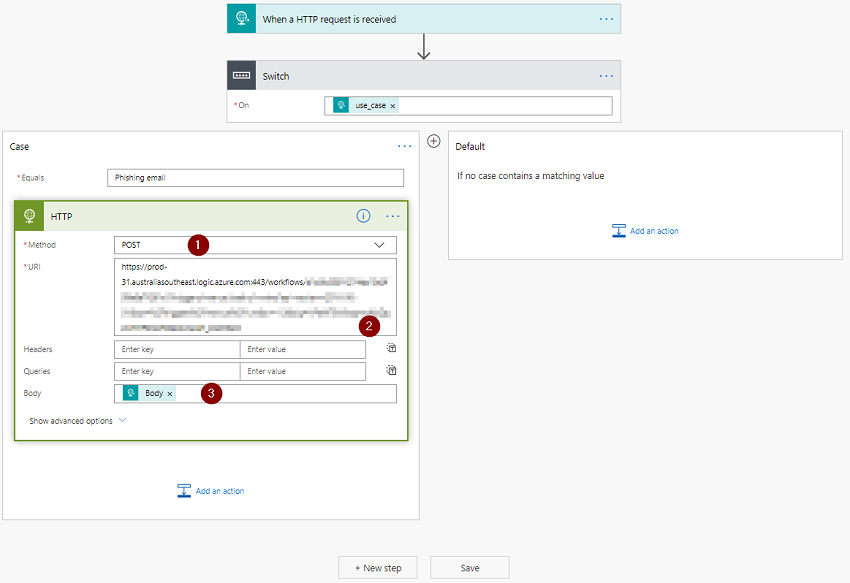
- Select
POSTas the Method - Enter in the
HTTP POST URLfrom thePhishingworkflow you created earlier - Using the Dynamic Content window, add
Bodyto theBodyfield
To add additional use cases, just define them as part of the switch and create a new flow that defines what you will do.
Add the responder to Cortex
With that out the way, grab a copy of the Responder from my Github Repository. SSH to your Cortex server and add the files. If you need some help with how do do that or have not configured a custom location for Cortex, head over to the following post Writing my first responder for TheHive
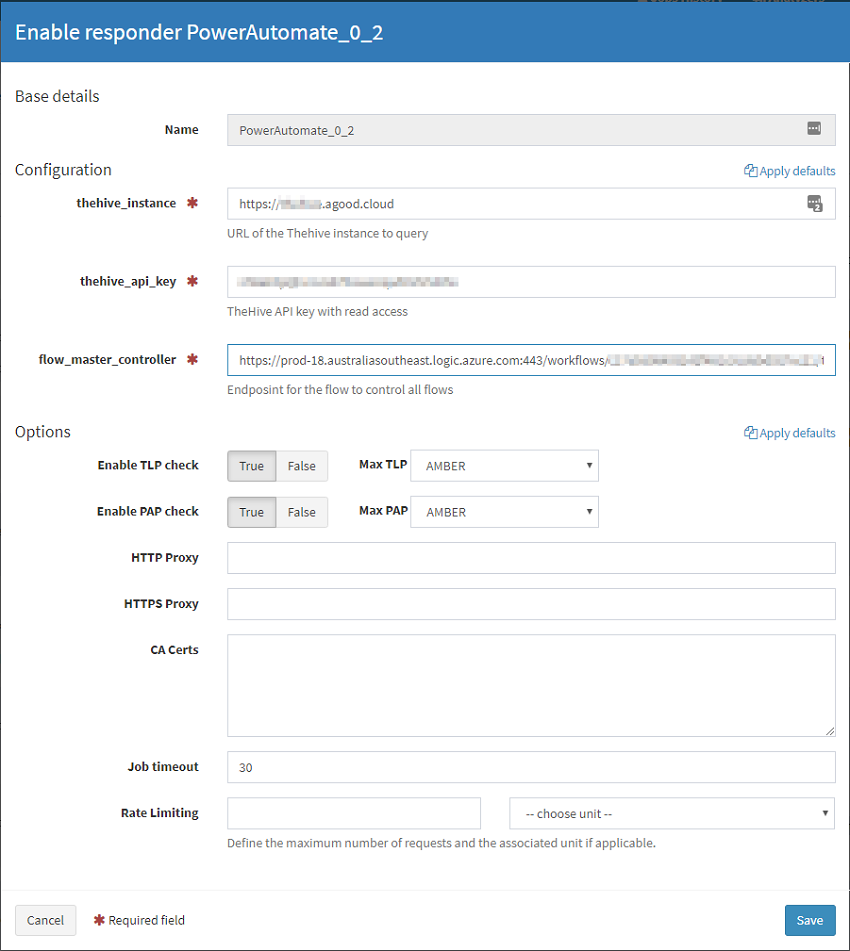
Next, we configure the Responder by logging into the Cortex UI, Select Responders, Refresh Responders. Find PowerAutomate_0_2 and press Enable. Complete the required fields. The flow_master_controller URL will be the endpoint for your controller flow that you setup earlier.
Generate a test alert
Within the github repository there is a file called CreateTestAlert.py. You will need to modify it and add in your API Key and Hive URL. Also within TheHive check the account you are using has access to create alerts from the users screen. Run the script.
$ python ./CreateTestAlert.py

# Prettified Output
{
    "severity": 2,
    "date": 1575091763803,
    "_routing": "38c4ba96dcc49f1c4dcc34a025353447",
    "customFields": {},
    "_type": "alert",
    "description": "generic alert description in here",
    "lastSyncDate": 1575091763803,
    "source": "email",
    "type": "Python generated",
    "follow": true,
    "title": "test alert - Phishing email",
    "tags": [
        "test1"
    ],
    "createdAt": 1575091763789,
    "_parent": null,
    "createdBy": "admin",
    "tlp": 2,
    "_id": "38c4ba96dcc49f1c4dcc34a025353447",
    "id": "38c4ba96dcc49f1c4dcc34a025353447",
    "sourceRef": "16901119-8d48-47af-9c53-6d06ad81c22f",
    "_version": 1,
    "artifacts": [
        {
            "dataType": "other",
            "message": "use_case",
            "data": "Phishing Email"
        },
        {
            "dataType": "url",
            "message": "url",
            "data": "https://blog.agood.cloud"
        },
        {
            "dataType": "mail_subject",
            "message": "email_subject",
            "data": "Sample email subject!"
        },
        {
            "dataType": "other",
            "message": "dst",
            "data": "adrian@agood.cloud"
        },
        {
            "dataType": "other",
            "message": "src",
            "data": "themalicious1@somel33tr4nd0mhaxx0rdomain.com"
        }
    ],
    "status": "New"
}
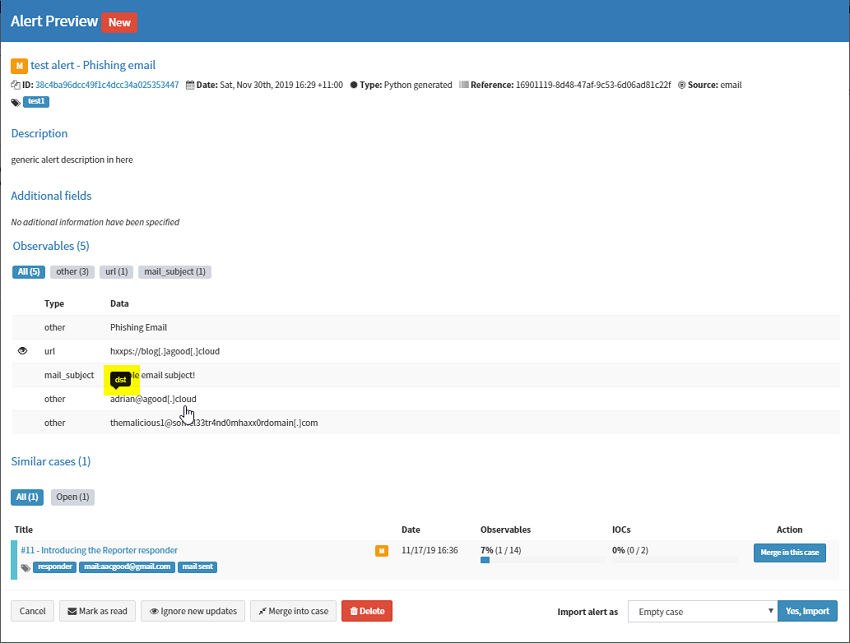
In TheHive, your alert will appear as follows. Pay special attention to when you hover over an observable, a popup with the Message is shown (dst in this case).
 .
.
Run the responder
Using the Cog icon to the right of the alert, select PowerAutomate_0_2.

Check that your workflow ran successfully back in Microsoft Power Automate under Run History. Here is the output from the Controller.
Here is the output from child Phishing workflow that gets called.
And finally, this is the email the user receives.
Conclusion
If you made it this far, awesome job, I know it was a long read and I’ve tried to provide a fairly simple demo which you can expand out on. As you can see, we have only performed a tiny fraction of what is possible. As far as using Microsoft Power Automate to tap into your security tools, you would simply bring in the data you need in the initial JSON data, and add another HTTP POST call at the end pointing at your security device.
Next time, I’m going to attempt this again but using Open Source Tools like Node-RED or Apache Nifi.
Please let me know if you do attempt the instructions in this post. Contact me here, and don’t forget to follow me on Twitter