By Adrian | September 22, 2019
This is part 4 of TheHive/Cortex/MISP build. In this part were standing up Cortex. Links to the previous articles are here:
Part I - Building TheHive
Part II - Setup reverse proxy for TheHive
Part III - Building MISP
Part IV - Building Cortex
Part V - Adding analyzers to Cortex
Part VI - Setup reverse proxy for Cortex
Part VII - Integrate TheHive and Cortex
Part VIII - Integrate MISP to TheHive
Part IX - Upgrading TheHive
Part X - Updating MISP
Part XI - Upgrading Cortex
Part XII - Wrapup of TheHive, MISP, Cortex
TheHive is awesome in itself. It provides an free, open source Security Incident Response and case management platform for your Security Operations Center. Coupling it with MISP and you have now added a threat intellegence platform. Completing the trifecta is Cortex which extends TheHive with automation capabilities through the use of Analysers, and trust me, instead of having to manually plug an observable into some web portal which usually ends up being multiple different portals for different observables, analysis becomes a matter of selecting a menu option.
Here are the steps I took for the base build. I plan on splitting this into multiple posts.
Create Ubuntu 18.04 Server
A VM is a VM. Im using Hyper-V in this case, but you could use VMWare esxi, VMWare Workstation, Virtual Box or one of many other virtualisation providers in this space. Ive setup the logon user as cortex.
Update the Operating System
After the OS has been built, perform a standard OS update and reboot
sudo apt-get update && sudo apt-get upgrade -y && sudo reboot now
Install OpenJDK
sudo add-apt-repository ppa:openjdk-r/ppa
sudo apt-get update
sudo apt-get install openjdk-8-jre-headless
Install Elasticsearch
Were going to install Elasticsearch onto the same VM
# PGP key installation
sudo apt-key adv --keyserver hkp://keyserver.ubuntu.com:80 --recv-key D88E42B4

# Debian repository configuration
echo "deb https://artifacts.elastic.co/packages/5.x/apt stable main" | sudo tee -a /etc/apt/sources.list.d/elastic-5.x.list

# Install https support for apt
sudo apt install apt-transport-https

# Elasticsearch installation
sudo apt update && sudo apt install elasticsearch
Configure Elasticsearch
We need to run these commands as root, or you will get permission denied errors
sudo su
nano /etc/elasticsearch/elasticsearch.yaml
Edit the elasticsearch.yaml file and make the following changes. Uncomment and update the lines where necessary. When reading the official documentation from Cortex script.inline was set to on instead of true. This meant the Elasticsearch service would not start.
network.host: 127.0.0.1
script.inline: true
cluster.name: hive
thread_pool.index.queue_size: 100000
thread_pool.search.queue_size: 100000
thread_pool.bulk.queue_size: 100000
Start the elasticsearch service
sudo systemctl enable elasticsearch.service
sudo systemctl start elasticsearch.service
sudo systemctl status elasticsearch.service

# End sudo
exit
Download and Verify Cortex
I want this install of Cortex to be deliberably out of date, to be in line with my current out of date version of TheHive and MISP. Ordinarily, you should be aiming for the latest stable release, but I also need to get all the integration working correctly so that I can document the upgrade steps of the 3 systems in later blog posts. For this reason im going to install Cortex version 2.1.3. Version 3.0 has only been released in the last fortnight as of the date of this blog post.
Import the PGP key for the-hive (Optional but do it)
cd /opt
sudo wget https://raw.githubusercontent.com/TheHive-Project/cortex/master/PGP-PUBLIC-KEY
gpg --import PGP-PUBLIC-KEY

# Output
gpg: /home/adrian/.gnupg/trustdb.gpg: trustdb created
gpg: key 3D99BB18562CBC1C: public key "TheHive Project (TheHive release key) <support@thehive-project.org>" imported
gpg: Total number processed: 1
gpg:               imported: 1
Download and verify
sudo apt-get install unzip
sudo wget https://dl.bintray.com/thehive-project/binary/cortex-2.1.3-1.zip
sudo wget https://dl.bintray.com/thehive-project/binary/cortex-2.1.3-1.zip.asc

# Verify signatures file against the download to ensure integrity
gpg --verify cortex-2.1.3-1.zip.asc cortex-2.1.3-1.zip

# Output

gpg: Signature made Thu 20 Dec 2018 01:57:53 PM UTC
gpg:                using RSA key 3D99BB18562CBC1C
gpg: Good signature from "TheHive Project (TheHive release key) <support@thehive-project.org>" [unknown]
gpg: WARNING: This key is not certified with a trusted signature!
gpg:          There is no indication that the signature belongs to the owner.
Primary key fingerprint: 0CD5 AC59 DE5C 5A8E 0EE1  3849 3D99 BB18 562C BC1C
Extract Cortex
sudo unzip cortex-2.1.3-1.zip
sudo ln -s cortex-2.1.3-1 cortex
Pre-Configuration
Before we can start Cortex there are a few configuration settings that we need to apply. First we need to update the service file to change the paths from /etc to /opt
sudo nano /opt/coretex/package/cortex.service

# Change the exec start to this
ExecStart=/opt/cortex/bin/cortex \
        -Dconfig.file=/opt/cortex/conf/application.conf \
        -Dlogger.file=/opt/cortex/conf/logback.xml \
        -Dpidfile.path=/dev/null
Now we need to create the config file and add the secret
sudo mv /opt/cortex/conf/application.sample /opt/cortex/conf/application.conf

(cat << _EOF_
# Secret key
# ~~~~~
# The secret key is used to secure cryptographics functions.
# If you deploy your application to several instances be sure to use the same key!
play.http.secret.key="$(cat /dev/urandom | tr -dc 'a-zA-Z0-9' | fold -w 64 | head -n 1)"
_EOF_
) | sudo tee -a /opt/cortex/conf/application.conf
sudo addgroup cortex
sudo adduser --system cortex
sudo cp /opt/cortex/package/cortex.service /usr/lib/systemd/system
sudo chown -R cortex:cortex /opt/cortex
sudo chown -R cortex:cortex /opt/cortex-2.1.3-1
sudo chgrp cortex /opt/cortex/conf/application.conf
sudo chmod 640 /opt/cortex/conf/application.conf
sudo systemctl enable cortex
sudo service cortex start
First use
Now that Cortex and Elasticsearch have been setup and configured, you can access cortex via http://<ip>:9001

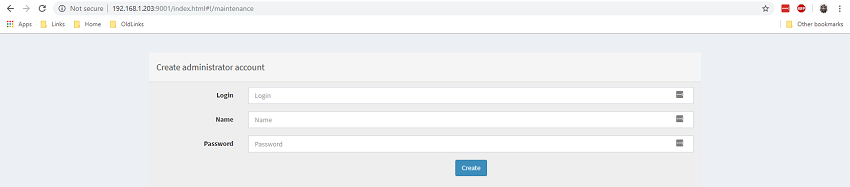
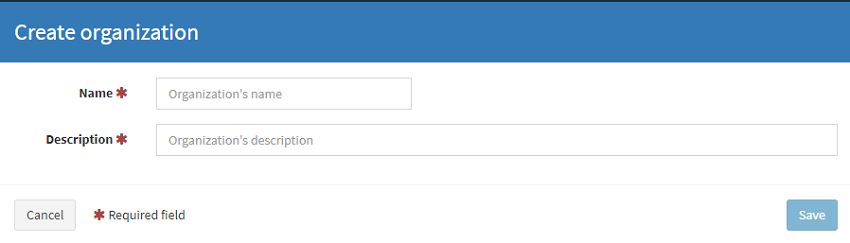
Cortex uses a multi-tennant system. The user details you specify on first launch become the superadmin for the parent orginisation. This orginisation is for the management of other orginisations, so you will need to create a new orginisation and new admin user for your purpose.
To setup a new orginisation login with your superadmin user and navigate to Orginizations and select Add Orginization (We just love Americianised spelling ;-)
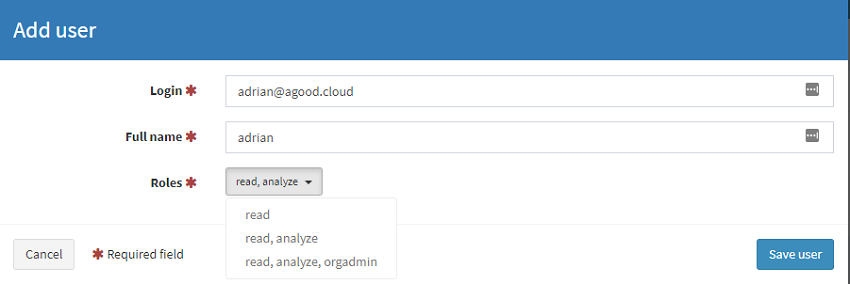
Next, select the new org and Add user. Note there are 3 self explainatory roles. Setup a user with the orgadmin role. This will be the user that is used to configure the analyers.
And thats it, the basic install of Cortex v2.3.1. In the next post i’ll go through and add, configure and test out a few analysers.
References