By Adrian | September 29, 2019
This is part 8 of the Cortex build. In this part I’m integrating TheHive with MISP and it doesnt go as smooth as I would have liked, but I got some good troubleshooting done in the process which I’ve documented. This will allow us to post observables to MISP from TheHive and vice versa! Links to the previous articles are here:
Part I - Building TheHive
Part II - Setup reverse proxy for TheHive
Part III - Building MISP
Part IV - Building Cortex
Part V - Adding analyzers to Cortex
Part VI - Setup reverse proxy for Cortex
Part VII - Integrate TheHive and Cortex
Part VIII - Integrate MISP to TheHive
Part IX - Upgrading TheHive
Part X - Updating MISP
Part XI - Upgrading Cortex
Part XII - Wrapup of TheHive, MISP, Cortex
As a security analyst you find that sometimes what starts of as an innocuous indicator can quickly turn into a beast in time as you start to unravel the inner workings of a file, phishing email or domain. You may start adding indicators into TheHive and then in turn share those indicators into MISP. Some time may pass before you see that indicator again, but when you do, MISP will be right there for you telling you what you saw the last time. This integration is another time saver, not having to copy/paste indicators between systems.
These are the steps that I took to enable the integration piece between TheHive and MISP.
Backup the existing config file
On TheHive server, take a backup of the application.conf file. There isnt too much configuration in this file so losing it wouldnt be hard to reconstruct, but its much easier to just recopy over the backup.
sudo cp /opt/thehive/conf/application.conf /opt/thehive/conf/application.conf.backup
Create a sync user in MISP
Login to MISP as an administrator and select Administration, Add User. Create a new user and grab its authkey. Give this user the Sync role. This is what we will use to add into TheHive configuration file.
Update TheHive application.conf file
Make the following changes to the /opt/thehive/conf/application.conf file. Scroll down to the section marked MISP. This is a fairly basic config that will get you up and running.
# MISP
# TheHive can connect to one or multiple MISP instances. Give each MISP
# instance a name and specify the associated Authkey that must  be used
# to poll events, the case template that should be used by default when
# importing events as well as the tags that must be added to cases upon
# import.

# Prior to configuring the integration with a MISP instance, you must
# enable the MISP connector. This will allow you to import events to
# and/or export cases to the MISP instance(s).

play.modules.enabled += connectors.misp.MispConnector

misp {
  # Interval between consecutive MISP event imports in hours (h) or
  # minutes (m).
  interval = 5m

  "MISP-SERVER" {
  #  # MISP connection configuration requires at least an url and a key. The key must
  #  # be linked with a sync account on MISP.
    url = "https://misp.example.com"
    key = "<AUTH_KEY IN HERE>"
  #
  #  # Name of the case template in TheHive that shall be used to import
  #  # MISP events as cases by default.
  #  caseTemplate = "<Template_Name_goes_here>"
  #
  #  # Optional tags to add to each observable  imported  from  an  event
  #  # available on this instance.
  #  tags = ["misp"]
  #
  #  ## MISP event filters
  #  # MISP filters is used to exclude events from the import.
  #  # Filter criteria are:
  #  # The number of attribute
    max-attributes = 1000
  #  # The size of its JSON representation
    max-size = 1 MiB
  #  # The age of the last publish date
    max-age = 7 days
  #  # Organization and tags
  #  exclusion {
  #    organisation = ["bad organisation", "other organisations"]
  #    tags = ["tag1", "tag2"]
  #  }
  #
  #  ## HTTP client configuration (SSL and proxy)
  #  # Truststore to use to validate the X.509 certificate of the MISP
  #  # instance if the default truststore is not sufficient.
  #  # Proxy can also be used
  #  ws {
  #    ssl.trustManager.stores = [ {
  #      path = /path/to/truststore.jks
  #    } ]
  #    proxy {
  #      host = proxy.mydomain.org
  #      port = 3128
  #    }
  #  }
  #
  #  # MISP purpose defines if this instance can be used to import events (ImportOnly), export cases (ExportOnly) or both (ImportAndExport)
  #  # Default is ImportAndExport
  #  purpose = ImportAndExport
  }
}
Restart TheHive service
service thehive restart
service thehive status
Login to TheHive and check Admin, About.
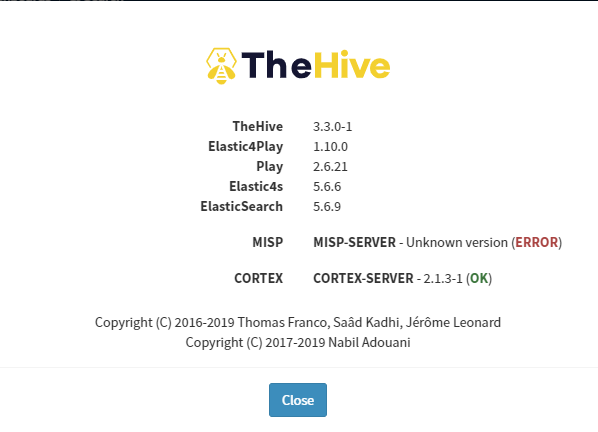
It’s right about now I’ve got an issue :( The MISP config has an error somewhere. OK, ill troubleshoot that and check /var/log/thehive/application.log. Hrm that folder doesnt exist. Mental note…. update my documentation for TheHive to include creating this folder!
Create TheHive logging folder on TheHive server
sudo mkdir /var/log/thehive
cd /var/log
chown thehive:thehive thehive

sudo service restart thehive
Now I can check the application.log which shows this particular error:
2019-09-27 00:23:37,977 [INFO] from connectors.misp.MispSynchro in application-akka.actor.default-dispatcher-8 - Misp synchronization failed
java.net.ConnectException: General SSLEngine problem
I’m thinking theres something wrong with the certificate at this point, so I check it using this command.
curl https://misp.example.com

# Output
curl: (60) SSL certificate problem: unable to get local issuer certificate
More details here: https://curl.haxx.se/docs/sslcerts.html

curl failed to verify the legitimacy of the server and therefore could not
establish a secure connection to it. To learn more about this situation and
how to fix it, please visit the web page mentioned above.
So yeah, I have some weird certificate issues going on here. I have a feeling its something to do with certificate trust and Lets Encrypt here, so I run this command to see if it shows anything of interest.
curl --insecure -v https://misp.example.com 2>&1 | awk 'BEGIN { cert=0 } /^\* Server certificate:/ { cert=1 } /^\*/ { if (cert) print }'

# Output
* Server certificate:
*  subject: CN=misp.example.com
*  start date: Sep 26 08:16:04 2019 GMT
*  expire date: Dec 25 08:16:04 2019 GMT
*  issuer: C=US; O=Let's Encrypt; CN=Let's Encrypt Authority X3
*  SSL certificate verify result: unable to get local issuer certificate (20), continuing anyway.
* Connection #0 to host misp.example.com left intact
And yes, theres a line that doesnt seem right unable to get local issuer certificate (20). I next logon to the MISP server and run this command to see what certificates I have configured in apache2:
sudo grep -r SSLCertificate /etc/apache2

# Output
/etc/apache2/sites-available/misp-ssl.conf:    SSLCertificateFile /etc/ssl/private/misp.local.crt
/etc/apache2/sites-available/misp-ssl.conf:    SSLCertificateKeyFile /etc/ssl/private/misp.local.key
/etc/apache2/sites-available/misp-ssl.conf:#    SSLCertificateChainFile /etc/ssl/private/misp-chain.crt
/etc/apache2/sites-available/default-ssl.conf:          #   SSLCertificateFile directive is needed.
/etc/apache2/sites-available/default-ssl.conf:          SSLCertificateFile      /etc/ssl/certs/ssl-cert-snakeoil.pem
/etc/apache2/sites-available/default-ssl.conf:          SSLCertificateKeyFile /etc/ssl/private/ssl-cert-snakeoil.key
/etc/apache2/sites-available/default-ssl.conf:          #   Point SSLCertificateChainFile at a file containing the
/etc/apache2/sites-available/default-ssl.conf:          #   the referenced file can be the same as SSLCertificateFile
/etc/apache2/sites-available/default-ssl.conf:          #SSLCertificateChainFile /etc/apache2/ssl.crt/server-ca.crt
I note that the SSLCertificateChainFile is commented out and that the misp-chain.crt file does not exist in that path. I enable the chain file option in my misp-ssl.conf file and copy the chain file from let's encrypt with the following steps:
sudo su
cd /etc/letsencrypt/live/misp.example.com
cp chain.pem /etc/ssl/private/misp-chain.crt

# uncomment out the required line in misp-ssl.conf
nano /etc/apache2/sites-available/misp-ssl.conf

# restart apache2
service apache2 restart
And now when I go back to TheHive server and run this, the certificate verifies OK now.
curl --insecure -v https://misp.example.com 2>&1 | awk 'BEGIN { cert=0 } /^\* Server certificate:/ { cert=1 } /^\*/ { if (cert) print }'
* Server certificate:
*  subject: CN=misp.example.com
*  start date: Sep 26 08:16:04 2019 GMT
*  expire date: Dec 25 08:16:04 2019 GMT
*  issuer: C=US; O=Let's Encrypt; CN=Let's Encrypt Authority X3
*  SSL certificate verify ok.
* Connection #0 to host misp.example.com left intact
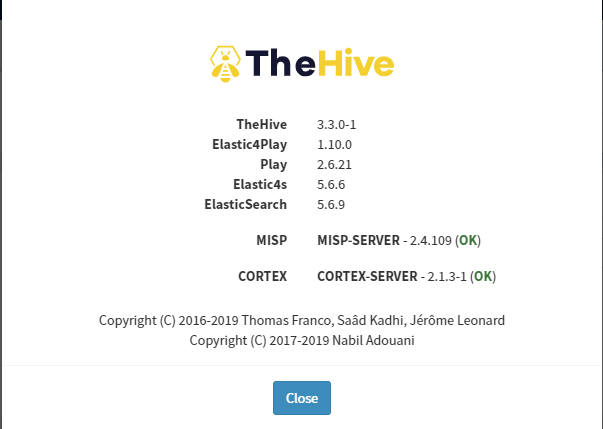
Once again I restart thehive service and check Admin, About. We have success now!
Test sending events from TheHive to MISP
Create a test case in TheHive and add in an observable. In this case I’ve created 1 observable with the IOC flag set and another without it set.
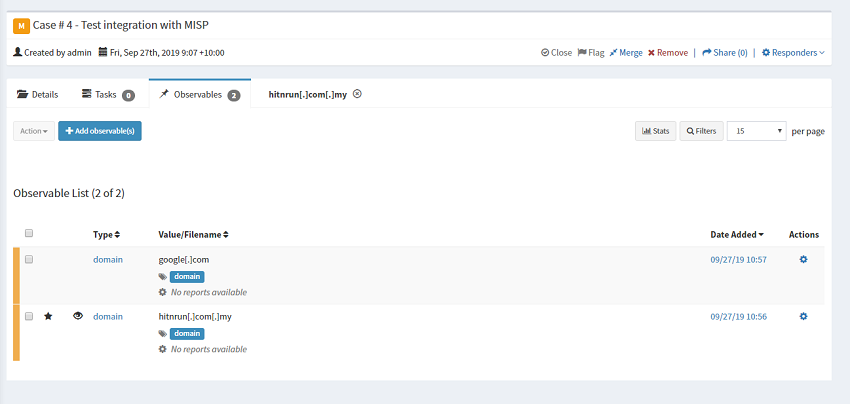
To send this over to MISP, use the Share option in the case title area.

If you login to the MISP frontend you will see that this event has come across OK. You will also note that only events that are tagged as IOC come across.
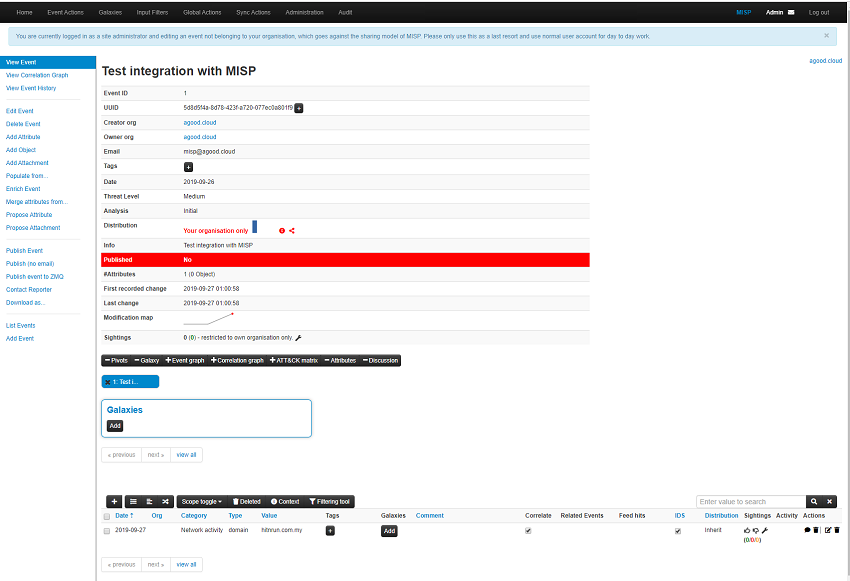
Test sending events from MISP to TheHive
Given that this is a 2-Way relationship we can also created events in MISP and send them over to TheHive. From MISP create a new event with a few attributes. I’ve marked the dodgy looking .ru domain one as for Intrustion Detection System and another attribute without this setting.
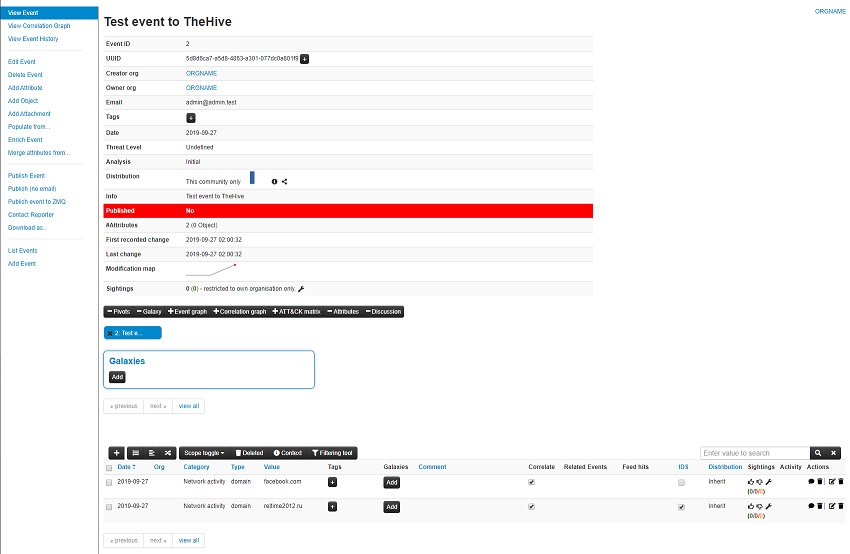
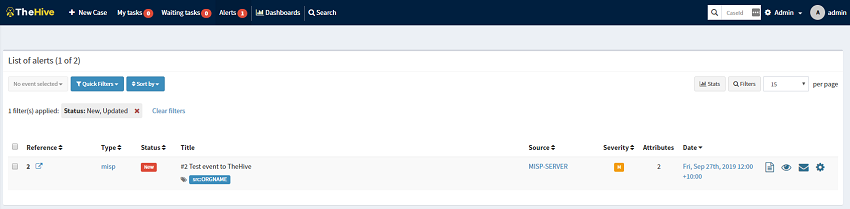
To send this over to TheHive, you need to select Publish Event (no email) from the left hand pane and select Yes when prompted. The interval we configured in TheHive’s application.conf file was 5 minutes, so you may have to wait a few moments for the MISP alert to arrive into TheHive. When it does arrive it will be under Alerts. From here you can import the alert, ignore the alert, or mark it as read.
And thats about it for basic connectivity testing. At this time we have TheHive/Cortex and MISP built, configured and integrated together, but theres one thing that these technologies are not, and that is a set and forget system! These systems need a little love and attention to keep them updated and in the next few posts ill upgrade each.